Posted on

On Marines, Camouflage, and Salty Gear

with Jukka Salonen

When we think of Marines and the Vietnam war, we often picture them in Olive Green battle uniforms and webbing. Tiger-stripe camouflage… The whole works. To a part this is true thing, but there is much more than that. This article is written with the thought that even though Marines are mean and green, there is much more to them, colour-wise, than that.

Camouflage
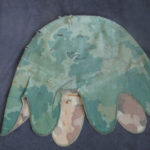
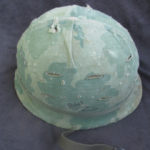
The Marines entered the Vietnam conflict in 1965. When they arrived, they did not have camouflage, except on their helmets. The helmets used the so-called “wine leaf pattern” camouflage helmet cover. It was two sided: Green Brown and a cloudy brown pattern. This pattern was designed originally in 1953, and reminds of the older WWII patterns used in the Pacific theatre. This pattern was only made for helmets and shelter halves and used by both the army and the Marines. It was also copied by private companies in the far east, and along with the cannibalizing of old camouflaged gear, found itself sewn into other gear by custom tailoring.


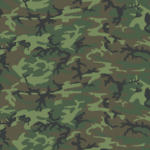
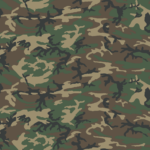
In 1948, the US Army Engineer Research and Development Laboratory, aka. ERDL, designed a new camouflage uniform pattern. This is usually called ERDL camouflage, or just ERDL. A pattern that looks a lot like the later US woodland pattern, which is basically a magnified ERDL print. The clothes with this pattern were doled out in 1967 to special forces and also saw use with ANZAC special troops. But what is important to us is that it was also favored by the US Marines. The camouflage pattern itself was also nicknamed ‘Leaf pattern’ or ‘Flower Power fatigues’. The ERDL existed in a lighter, and darker version, respectively lowland and highland versions. Apparently Marines favored the lighter lowland version.

However you decide to paint your troops, remember that clothes received far tougher use than our clothes get. In first-hand stories from different wars, from the Finnish winter war to the war on terrorism in Afghanistan, the pants appear to be the first uniform piece to wear out. So many Marines might just wear the top or the bottom of the ERDL pattern uniform instead of the full set.

But do remember, once the ‘flower power’ fatigues started to be doled out it started to become rarer and rarer to see Marines in green uniforms. By 1970 camouflage uniforms were the standard. Mother Nature’s green killing machines started to blend in.

Salty Gear
Marines liked their gear to look used. Or salty, as they themselves say. Salty means, amongst other things, gear that has seen use and thus gives its wearer an air of being experienced. Older, worn uniforms are also thought to be more comfortable.

This means the color on the webbing and gear might vary in all the glorious colours of the stained sweated-or-bled-on colour palette. A Marine might have packed even old WWII-era gear just because it was thought of as salty. The original Marine webbing in Vietnam was the old WWII M1945-webbing. But Marine Command had made the nice gesture and added the army WWII shoulder paddings to the original webbing. All pieces were re-coloured before being issued, and apparently, some of it is still stored unused into the present day. At least my original M1956 webbing suspenders of my reenactment kit came to me unused. Later, the Marines started receiving the M1956 webbing used by the army since the early 60s. Later on everybody started receiving the modernized M1967 gear, designed specially for the Vietnam conditions. Canvas rotted in the jungle, and weighed more especially when wet- the M1967 Nylon ones did not have any of these problems.
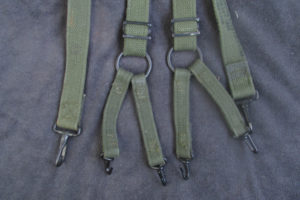
Webbing

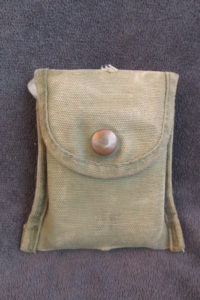
The pistol holsters and knife sheaths were leather, so they should probably be either brown or black or something in between, with black being the more common post-WWII. Even though the Ka-Bar knife’s sheath is mostly brown, leather becomes more and more black when it meets sweat and mud. Pistol holsters seem to have been black at this point, but brown was the usual color in the previous conflicts. The boots were black, so called ‘jungle boots’ which had green canvas pieces were also used, so there is a challenge for those who want to paint small details.

Marines used the leaf pattern helmet cover, but they might also have at times gone without the helmet cover. Similarly, the helmet band was not used in the beginning of the conflict. Early helmets could have had a black band made of the inner tube of a tire. Even when the helmet-band was available it lacked the “cat eyes” reflectors the modern ones have. The helmets were often graffiti clad and could also have foliage added on them, but foliage is rarely seen in photos.

But be the gear old or new, there was always the idea of saltiness. So at least a part of the gear could (or maybe even should?) be painted more worn and scruffy. Also, the colors on the non camouflaged gear seem to have varied a tad, depending on the exact model and make. Quite like the German WWII uniforms you often see the pictures of. Google up for example utility shirts of models P53, P56, P58, and P63, and they all have a different tone of “military green.” So if you don’t have the exact right green tone on a short sleeved shirt. It really is nothing. It might even be white, but insanely dirty in that case. (And now I´m thinking about painting one miniature that way!)
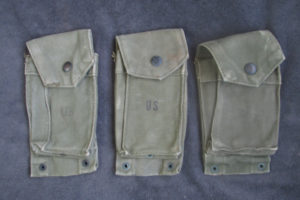
Magazine pouches for the M-14. Note how the colors are worn. 

The Marines were also notorious termites. Apparently they traded or “borrowed” gear they were not issued with if they thought they needed it, regardless of their webbing model. So even if the ‘Nam miniatures are kitted out in the new model webbing, one should not be shy to paint an odd pouch in a different color. Or for example an odd piece of pants in an allied force camouflage. Other camouflage patterns could be tiger-stripe, the south-Vietnamese airborne pattern and different blotchy “duck hunter” patterns. But I feel these would be few and far between on regular grunts. So a full grunt platoon in “duck hunter”, would not be plausible, but recon units would be a different waltz all together. They would be kitted mostly in full camouflage. I at least intend to try several patterns mixed out on my recon team.

But before you go all out and start making every figure an exception, with a multitude of different camouflaged gear. STOP! DO NOT! Though there were exceptions, make them here and there. If you make every miniature with a lot of differences, you end up with something looking in the best case like a special forces unit, and in the worst case like a post apocalyptic raider unit.

The camouflages mentioned here were worn only by people. Vehicles were all the colourful variations of worn olive drab.

And do not forget the mud and dust. Depending on which movies you have seen, the Vietnam war was muddy or dusty. A light dry brush hinting of mud or dust looks good on boots and the legs of the pants, or even here and there on elbows, bag bottoms… you get the picture.
How Do I Paint It?

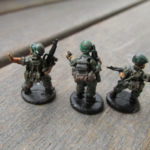
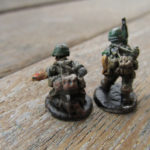
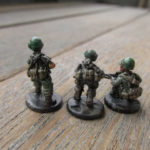
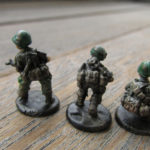
So far I have painted only leaf pattern helmets and some odd clothes (even one full leaf pattern uniform.) The lighter version I start with a base of some natural dark green color. After that, I apply blotches of Green Grey, and a handful of stripes in some brown tone. Then I give it a light Black Wash to bring out all the details. And after that, a spider web thin layer of an lightly uneven White dry brush (maybe with a tad Green Grey mixed in if I feel like it) to make it more scruffy looking.


I have not yet painted any darker versions of the vine leaf pattern since I go with the “Vietnam was wet and muggy” version. So I can not give any tested ideas on how to paint. But it is just basically four different sandy color tones, painted in big, cloud-like blotches.

When painting the webbing, I usually make three paint stripes besides each other on the palette. One being Olive Drab, the other being something browner, and the other a lighter tone of the same. I dip the brush in one, and swipe left or right. Mix it together and paint as many webbing details with it, giving all the webbing have a slightly used tone. After that I apply black ink and a light dry brush with White and Brown-Green mix.

Here and there you might add some random things in colors from the US WWII late war painting guides to give it more variance, and do not forget the grenades. They were mostly olive drab, with a yellow stripe. Sometimes the rifles also had some kind of camouflage stripes on them. It was mostly a special forces thing, and there it seems to me to be mostly an ANZAC thing. But one or two rifles in a platoon would not look, to me, out of place.

As a conclusion I could say that if you are not sure what color something should have, paint it Olive Drab or Olive Green. And then dry brush it to make it look salty.

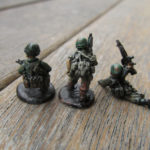
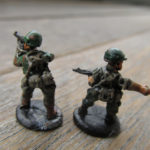
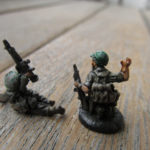
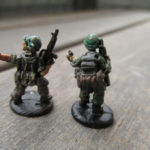
On the more exotic ideas, the field is yours to try out. Be sure to post pictures of them, and I’ll leave you with a few photographs of what I’ve gotten done so far.

Sources:
Osprey publishing. Warrior 23. US Marine Rifleman in Vietnam 1965-1973. Melson, Bujeiro.
Osprey Publishing. Battle Orders 19. The US marine corps in the Vietnam war. Gilbert. Anderson.
http://camopedia.org
Vietnamgear.com
I also would like to thank the Terminal Lance webcomic, on helping me understand better the many faceted USMC sub-culture.

Extras For Experts
Battlefront Studio Painter Aaron also recommended a few videos for those who want to check out more ‘Nam gear for information or inspiration:
Posted on

Bushrangers: The Flying Kangaroo

with Hauke Kolle

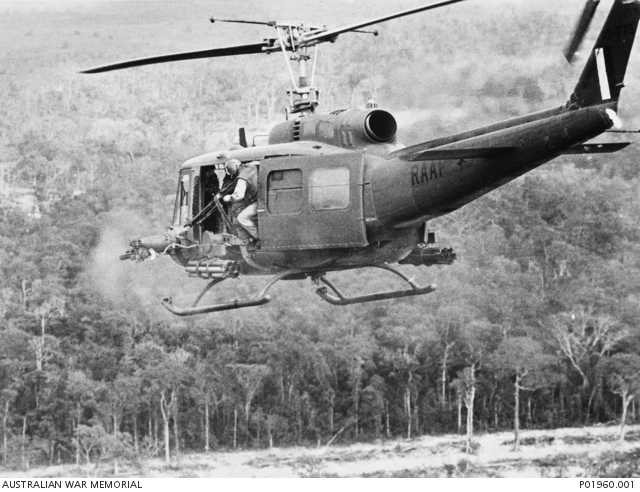
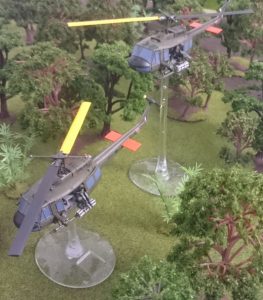
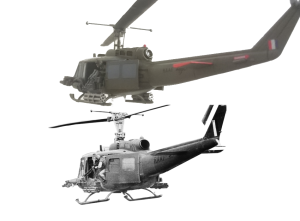
Although not nearly as numerous or famous as their American counterparts, the Royal Australian Air Force (RAAF) also operated helicopter gunships in Vietnam. While waiting for the bureaucrats in Australia to approve the purchase of gunship kits, the men on the ground traded beer for weaponry and modified the first gunship on their own. Thus, ‘Ned Kelly’, the first of four Australian gunships was created. They were piloted by airmen of No. 9 Squadron, RAAF, who were flying Australia’s UH-1H ‘Hueys’. The ‘Bushrangers’ provided the RAAF with the firepower to escort their medevac operations, along with the ability to directly support the infantry. The RAAF operated under quite restrictive rules of engagement, giving the infantry the impression they were not as brave as the American helicopter pilots (who they considered insane anyway!)

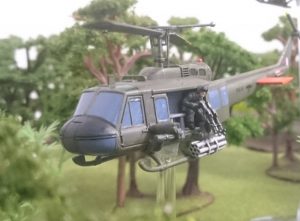
A Bushranger door gunner blazing away with his twin M60s.

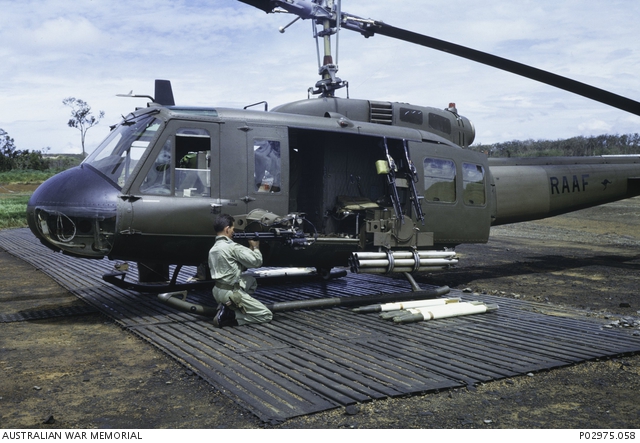
For day-to-day operations, out of the four helicopters, two ships would form a ‘Light Fire Team’, with the third helicopter held on stand-by and the fourth undergoing maintenance. The ships would cycle regularly between the roles, to guarantee their safe operation.

A Bushranger gunship undergoing maintenance. Notice the pylons’ forward positioning on the ship and the dual M60 gun mount for the door gunner.


Whereas the Americans mostly used the smaller UH-1B and UH-1C before introducing the AH-1 Cobra as a dedicated gunship, the Australians also converted the UH-1H, which was a transport-helicopter with a more powerful engine than the earlier D model. It was able to carry the same armament as the older models with ease, consisting of two M134 7.62mm ‘Miniguns’, each mounted beneath a pylons on either side of the aircraft and two M157 2.75″ 7-Tube rocket pods mounted beneath the weapon mounts of the two door gunners’
twin-M60 machine-guns. Yes, twin M60s! However any meaningful transport capacity was lost, since the passenger compartment was filled with ammo boxes for all those guns.

Looking at images of the different gunships you’ll notice that the miniguns aren’t always mounted in the same place. Some images show them mounted just behind the cockpit, while others have them mounted at the helicopter’s ‘waist’. You can find images of ‘Ned Kelly’, a UH-1B and the first Bushranger on the Australian War Museums excellent website and see that it carries all of its armaments in this compact manner. The H-model Huey gunships have their miniguns mounted on forward pylons, for easier ammo supply and less interference with the door gunners.
(For a short history of No. 9 Squadron, RAAF in Vietnam see: https://www.awm.gov.au/collection/U53557)

How to make your own UH-1H ‘Bushranger’ gunships
Battlefront doesn’t offer a complete kit to build the slightly bulkier gunships based around the UH-1H, but we will not let that stop us. If you’re playing ‘Nam and/or Team Yankee, chances are you will have some of the spare parts needed for our little conversion on hand, anyway, or know someone who does. If not, take a lesson from history, grab a case of beer and find a US air base near you and do a trade!

What you’ll need:
1x VUSBX17 UH-1 Huey Aviation Platoon (Plastic) -OR- TUBX07 Huey Helicopter Flight (Plastic)
From this you’ll need the entire kit. Pay particular attention to the M60s!


VUSBX16 AH-1 Cobra Gunships (plastic) -OR- TUBX05 AH-1 Cobra (Plastic)
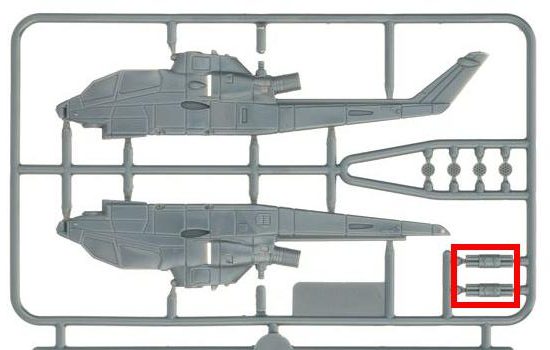
The Cobra sprue comes with 2 M157 rocket pods. If you know Team Yankee players who own Cobras, you might want to ask them, as they usually don’t use the small rocket pods for their 80’s-era gunships (they usually pack the larger, enclosed pods and TOWs).


1x VUSBX07 M113 Platoon -OR- TUBX03 M113 Platoon (Plastic)
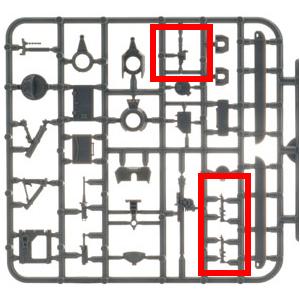
From this sprue we’ll need the M134 ‘Miniguns’. Each M113 plastic sprue comes with one minigun, so we’ll need four sprues – the exact contents of a platoon box. If you plan on running ANZACs in ‘Nam, you can use the M113s for that (and since ANZAC M113 use special turrets, you won’t even miss the miniguns). If not, you might want to ask around for the bits.

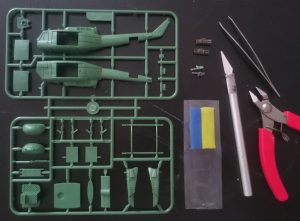
For one Bushranger you should have these components ready: 1x Huey sprue, 2x M134 Minigun from the M113 sprue, 2x M157 rocket pod from the Cobra sprue, a modeling knife, a pair of pliers, some modeling putty. Not in the picture: some glue and a bit of water to dip your modeling knife into while modeling the pylons and mountings.

To get started all you need to do is build your UH-1 Huey as normal, but leave out Step 11 for now (adding the door gunners).
NOTE: I highly recommend priming and painting the door gunner models separately, paint the helicopters interior first and then glue them in, after.

Conversion #1: Twin-M60s and rocket pods
When assembling the doorgunners’ machine-guns, attach a second M60 to the gun mount, parallel to the first one. You can do this one of two ways. Method one: File or clip off the mounting of one M60 (I suggest the one with the grip modeled). Then file of the pins on both M60s, so they are easier to glue together and combine them into a twin-M60. Attach the twin-M60 as normal.

Alternatively you can clip of the mounting of both M60s, file off the pins, glue them together and then re-attach the mounting in the center and glue your twin-M60s in the middle of the mounting.

Then, add the armament to turn it into a gunship! The rocket pods are mounted beneath the door gunners’ M60 mounts. (Note: I used metal rocket pods from an old kit for my conversion, but going with the new plastic ones is even better, as they are easier to glue to the other plastic parts and weigh less.) The 7-rocket M157 rocket pods were later upgraded to 19-rocket M200 rocket pods; so if you want to use those, you absolutely can!

Conversion #2: Miniguns
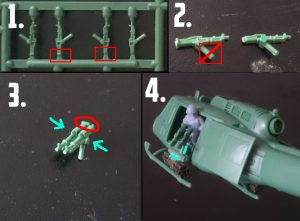
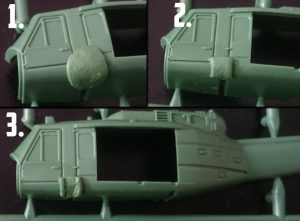
The miniguns are a bit trickier to do right. The easiest way would be to simply file of the pins of the guns and glue them directly to the sides of the fuselage. However, ideally you model the pylons (sometimes called booms) and their mounting. The mountings you can attach with the model still on the sprue; put a bit of modeling putty beneath the windows, between cockpit and transport compartment. Dip the blade of your modeling knife in a bit of water (so the putty won’t stick to it) and cut away the excess putty. Then, use the pliers to carefully model two rails on either side of the mounting. Finally flatten the central portion, where the pylon will be attached later on.

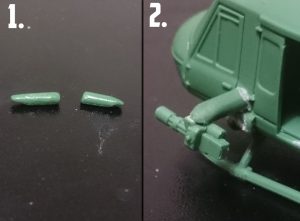
The pylons can easily be made out of modeling putty like green stuff. Simply roll a small amount of putty into cylinders, 1-2 millimeters in diameter and 6-8 millimeters long. While the putty is soft, use the plastic minigun bits to form a socket to glue them into, later. The miniguns need to ‘hang’ down from the pylons’ tips. Once the putty has hardened, glue on the miniguns. They might not fit perfectly. In that case just glue them on and fix any open cracks and crevices with a bit of modeling putty.


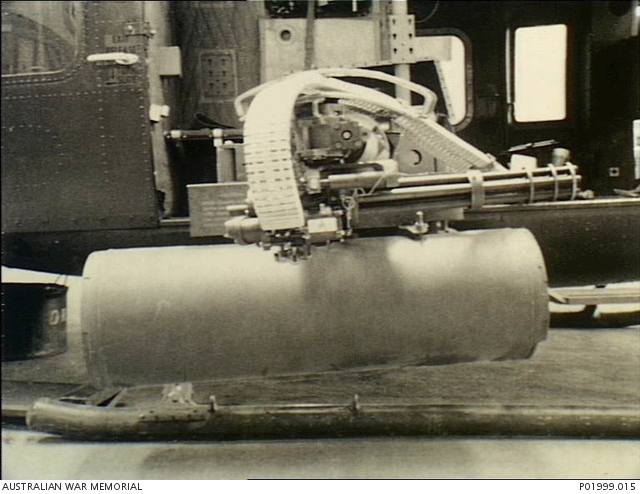
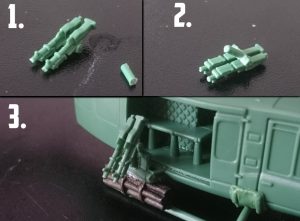
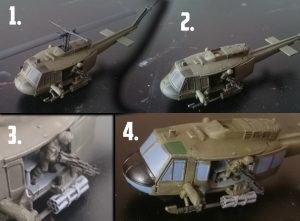
For a final touch you might want to clip down the rear of the miniguns a bit and add the ammo belts. For these I once more suggest using modeling putty. After mixing it thoroughly, form a small ball of 1-2mm diameter (to get the right mass) and then roll it between your fingers, until you have a thin line. The ammo belts attach to the outer side of the miniguns and feed back into the helicopter through a slit in the door. I modeled mine slightly wrong (feeding around the door and to the inner side of the miniguns…), so keep an image of the correct ammo belt handy at all times!

To make modeling a little easier, use a hobby knife and pliers. Before modeling, dip these into water, so your freshly modeled ammo belts won’t stick to your tools. Use the pliers to flatten the top and sides of the ammo belts. When everything has thoroughly dried (over a few hours), prime and paint your new light fire team.

Painting the Bushranger
I am not much of a painter. Gaming takes clear preference for me, however I offer you this guide for painting the bushranger, so you have something to go on. I have no doubt, that your models will look a lot nicer than mine!

For most of the process you can follow the painting guide for helicopters in ‘Nam (pages 203 and 207-208) and this video guide for painting the Cobra
https://www.youtube.com/watch?v=67JZsR_5Qd4.

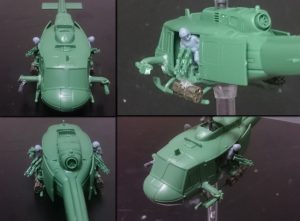
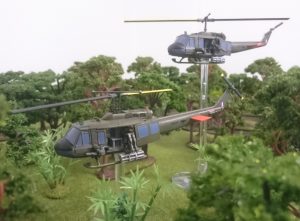
First I primed the model. I had glued everything together in one go, so that included the doorgunners. I painted the hull in olive drab (Vallejo Model Color 70.887 Brown Violet) and then drybrushed the model lightly with a mixture of VMC Brown Violet and VMC 70.886 Green Grey, to add some wear and tear.

Next I painted the helicopters interior and the rocket pods with Vallejo Game Color 72.050 Cold Grey. If you have VMC London Grey available, use that. Then I painted the windows (except for the one on top) with VGC 72048 Sombre Grey. A slightly darker fit would be VMC Luftwaffe Uniform or Colours of War Luftwaffe Blue. The top windows I painted with VMC 70923 Luftwaffe Camouflage Green, since I did not have the recommended VMC Flat Green available. You can see that I had a little accident with one of the windows; that’ll be cleaned up later.

The Hueys upper nose and the doorgunners’ boots then got some black paint. I used VGC 72051 Black, as I didn’t have the VMC variant available. All things metal then got painted with VGC 72155 Heavy Charcoal (alternatively VMC Worn Rubber).

Now the door gunners got their uniforms painted with VMC 70924 Russian Uniform, except for gloves, helmet and chest plate. Time for details. I started with the door gunners, painting their faces with VMC 70955 Flat Flesh. They later got a bit of Army Painter Strong Tone quickshade for added depth.

The rocket pods got light grey highlights and were done. Miniguns, ammo belts and M60s got highlights with VGC Cold Grey, then were dry brushed with VMC 70863 Gunmetal Grey. All windows and any surfaces I wanted to apply decals to got a coat of Vallejo Gloss Varnish 70510.

For a bit more shading I applied some Army Painter Strong Tone wash in the crevices. Finally I cleaned up any areas I had botched earlier with a fine brush and a steady hand. Almost done.

Decals and markings
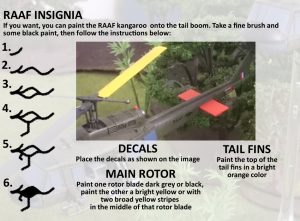
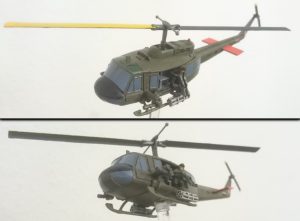
Of course you’ll want to use the ‘RAAF’ decal instead of the US Army one on the tail boom. Place it roughly in the middle between the tail fins and the point where the tail attaches to the main compartment. Place the flag (red-white-blue) on the tail fin, directly above the area where it attaches to the tail. If you feel brave and have a steady hand, pick a very fine brush and some black paint, to paint the kangaroo onto the tail. Don’t worry, it’s a lot simpler than it looks.

When you paint the bright coloured rotor blades and tail fins do yourself a favor and carefully prepare them with a sand-tone base coat first. This will bring the colours out a lot brighter and easier (although you will still need a few layers for a nice, even look). I used VGC 72006 Sun Yellow and VGC 72009 Hot Orange, because I did not have the VMC alternatives at hand.

You’ll find images of bushrangers in various states online, some of them no “Danger!”-arrows on the tail boom, some have two broad stripes on one rotor blade, others have a single rotor blade in bright yellow, to mark their position to aircraft higher up. You can paint them as I have painted them or research your own variants for more variety!

One last thing
The Bushrangers have no official Unit Card and no entry in the force organization plan. The simplest solution is to just use the models as a stand-in for a US Gunship Aeroweapons Platoon (page 83 of ‘Nam) taken as a US Allied Support Unit. This Unit can have no more than two helicopters, neither of which can be upgraded to become Gatling Gunships. I created a Unit Card myself, if you want to use that.

Special thanks to Battlefront and my friend Emanuel, who sponsored the parts I lacked for this conversion!
 

Posted on

Operation Buffalo

With Alan Graham
“Operation Buffalo was a motherf***er” , … Cpl John D. Musgrave, Medically Retired (Rifleman, 3d Platoon, D Company, 1st Battalion, 9th Marines, 1967-1968)

Operation Buffalo saw the worst casualties inflicted upon a single Marine Rifle company in a single day throughout the entire Vietnam war. B Company, 1st Battalion, 9th Marines which had started the day with approx. 150 men, lost 60 KIA, 60 WIA leaving less than 30 troops fit for duty.

Background
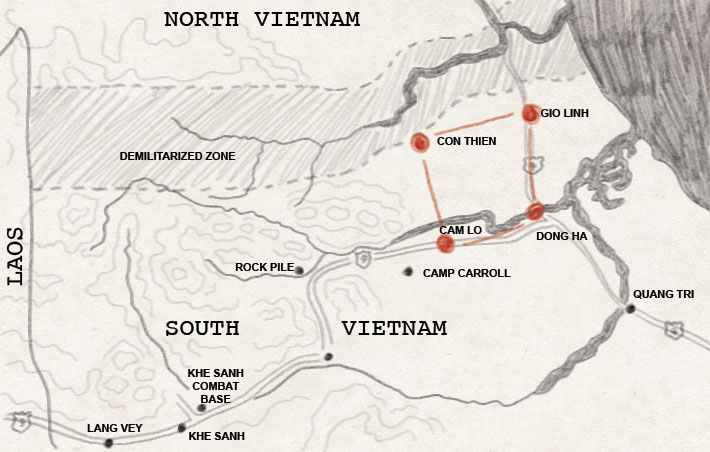
Just south of the DMZ (Demilitarized Zone or the Dead Marine Zone as the Marines themselves called it), Con Thien was a United States Marine Corps base intended to form a strongpoint on the McNamara Line.

The McNamara line was supposed to be a wide (approx. 600m) protected strip of land that stretched several miles from strong-point to strong-point containing obstacles, minefields and sensors and was constructed to prevent the NVA (North Vietnamese Army) from infiltrating large forces across the DMZ. Construction started in the Spring of 1967 and actually limited the Marine’s combat activity due to the resources required to build this defensive system. This area was known as Leatherneck Square because of the Marines situated in the surrounding bases at Con Thien, Gio Linh, Dong Ha and Cam Lo.

For an old US News Archive about Marine life in Con Thien see here…

The 324B NVA Division had tried several times already to infiltrate across the DMZ and the Marines had managed to thwart these attempts formulating a series of operations including Operation Hastings, Prairie I-IV, Cimarron to name a few and, at the beginning of July 1967, Operation Buffalo.

2nd July
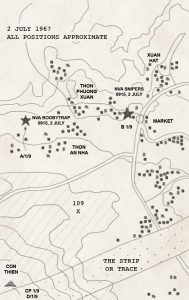
Early morning, Companies A and B of 1st Battalion, 9th Marines headed North on Highway 561, moving in parallel to each other at about 1000 metres apart. As B Company were close to a set of ruined buildings (known by the Marines as ‘the Market Place’ or just ‘the Market’) they made contact with the 90th Regiment 324B NVA Division and began to take sniper fire. As they responded by pushing forward to find the snipers the Marines were being sucked even deeper into an ambush and the enemy fire intensified. This was then backed up by coordinated enemy mortar and heavy artillery (from across the DMZ). The NVA also used flamethrowers to set alight to terrain, forcing the Marines back onto the road and exposing them to their fire.  A Company who were slightly further West had tripped two booby traps which had slowed them down and now they were taking fire themselves as they were trying to get to B Company. B Company’s Staff Sergeant Leon R. Burns called in air strikes which slowed and disrupted down the enemy, “I asked for napalm as close as 50 yards from us, some of it came in only 20 yards away. But I’m not complaining.”.

Click on the maps to see a larger version of them.

Back at Con Thien, the Command Post was listening to the battle as it unfolded and a first reaction rescue force was hastily assembled consisting of two forces, one from Con Thien which was made up of D Company and a platoon of four M48 tanks, the second was C Company (in Dong Ha) and would be helicoptered in to help. The Con Thien rescue force soon came under fire as it approached the cut-off troops but they managed to fend off an NVA unit that was trying to encircle B Company with some help from helicopter gunships. As C Company arrived on their LZ they to immediately came under heavy artillery fire and 11 men were wounded.
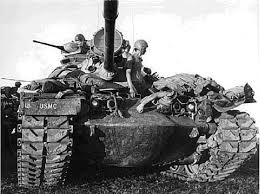
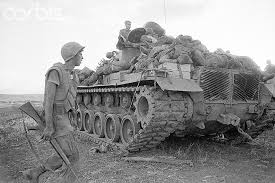
Despite the casualties the combined rescue force pushed on and soon met with the remaining Marines from B Company and started to organise a withdrawal. As many of the dead and wounded as possible (but not all) were brought back and were loaded up on the tanks, who then despite still being under attack from infantry and artillery set off South to the evacuation LZ.  Two tanks hit mines which further slowed down their progress. Once at the LZ yet more artillery caused more casualties and in the confusion almost 50 people headed back on foot to Con Thien, eventually these were picked up in the Trace and headed back to relative safety.
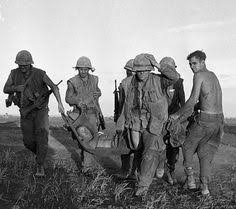
Click here to See Vietnam Tankers – Operation Buffalo Tank Crew Reunion interview for a fascinating first hand description of their actions that day…

More reinforcements were also arriving, K Company, 3rd Battalion, 9th Marines which was the battalion’s Bald Eagle Company, on standby at Dong Ha to reinforce any battalion who was in need, were dropped by helicopter in the Trace and made their way North to support A Company.
A Company meanwhile still remained in contact with the enemy and after successfully medevac’ing its first set of casualties, found their LZ being mortared then assaulted. However, by holding a defensive position and with K Company and artillery support they held their ground until the evening when the enemy finally withdrew.

At the end of the day, the battalion counted the total number was 53 KIA, 190 WIA and 34 missing (eventually leading to a count of 84 KIA).

3rd to 5th July
From the Combat After Action Report, Operation Buffalo, “…The NVA Forces appear to be fully aware of the Marine tradition to remove all wounded and dead from the battle field. Evacuation efforts were covered by enemy artillery, mortar and small arms-fire…”

More men were brought forward to recover the MIA. Companies I, K and L, 3/9 and a Battalion Landing Force 1/9 along with a couple of M48 tanks were moving back up to the Marketplace.

Continuous airstrikes the previous day had prepared for the attack, but heavy resistance was still met by the Marines, resulting in another 15 KIA and 33 WIA. Finally, there was relatively little ground contact and so the MIA could be searched for and almost all were found and returned to Con Thien.

6th and 7th July
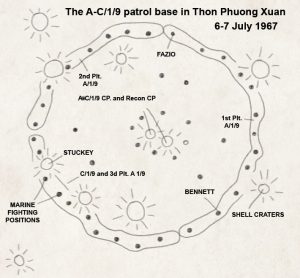
There were still several significant actions within Operation Buffalo, one of which was the establishment of a patrol base by Alpha-Charlie Company, 1st Battalion, 9th Marines, 3rd Marne Division. This base was over 1km forward of the battalion line, just less than 2km South of the DMZ, in a hamlet called Thon Phong Xuan. While on early morning patrol A-C company discovered an unoccupied NVA Bunker complex which they then themselves occupied with a three-sixty perimeter and waited. Towards early evening, lookouts spotted approx. 400 NVA marching in column to the bunker complex and radioed ahead. The Marines then sprang their ambush and immediately caused significant casualties among the NVA, the rest immediately ran for cover to the sound of their bugle. The NVA soon re-organised and had mortar rounds coming down on the Marines, and were pushing forward through the bushes, and a series of repeated assaults were attempted which were pushed back throughout most of the night.

In one instance, Lance Corporal Stuckey’s crater was being attacked by the NVA who were throwing Chicom grenades into his position, Stuckey responded by picking them up and throwing them back, until one finally exploded in his hand and took it off. Unable to continue fighting. Stuckey initially refused to leave his companion but eventually had to pull back, and in doing so was shot in the leg and then concussed by more grenades before feigning death until morning where he was discovered and returned to relative safety. Lance Corporal Stuckey was awarded the Navy Cross for his actions. A-C1/9 then left the patrol base early the following morning and just 30 minutes after they had left the NVA started bombarding the base with mortar rounds.
8th July
The last significant fighting took place South-West of Con Thien when G Company BLT 2/3 discovered a bunker complex, after taking a small amount of fire, artillery and air support was immediately called to attack it. The follow up operation still found some NVA continuing to fight, eventually the bunker complex was cleared with 2 Marines KIA and 29 WIA. G Company reported 39 dead NVA.

9th to 14th July
There were no more significant ground operations, only harassing artillery fire.

The operation ended on the 14th July.

The Marines reported enemy dead at 1,290 KIA and 2 captured. Marine losses in contrast totaled 159 KIA and 345 wounded.

References

  1. Operation Buffalo: USMC Fight for the DMZ by K.W. Nolan 1992
  2. U.S. Marines In Vietnam: Fighting The North Vietnamese, 1967 by Gary L Telfer; Lane Rogers; V Keith Fleming. https://archive.org/details/FightingTheNorthVietnamese…
  3. https://en.wikipedia.org/wiki/Operation_Buffalo_(1967)…
  4. Vietnam Tankers, Operation Buffalo, 2nd July 1967, https://www.youtube.com/watch?v=b34it0qisi4…
  5. http://www.talkingproud.us/Military/WalkingDead/WalkingDead.html…


Privacy and Cookie Policy

Hi there

We’ve created this policy which covers how we…

  • Collect
  • Use
  • Disclose
  • Transfer
  • Store

… your data.

1. Introduction and General Terms

Battlefront Miniatures NZ Ltd (henceforth referred to as Battlefront Miniatures) is committed to protecting your personal information when you are using our services. This Privacy and Cookies Policy relates to our use of any personal information we collect from you via the following online services:

  • any Battlefront Miniatures website that links to this Privacy and Cookies Policy;
  • social media or official Battlefront Miniatures content on other websites;

It also relates to our use of any personal information you provide to us by phone, SMS, email, in letters and other correspondence and in person.

In order to provide you with the full range of Battlefront Miniatures services, we sometimes need to collect information about you.

This Privacy and Cookies Policy explains the following:

  • what information Battlefront Miniatures may collect about you;
  • how Battlefront Miniatures will use information we collect about you;
  • when Battlefront Miniatures may use your details to contact you;
  • whether Battlefront Miniatures will disclose your details to anyone else;
  • your choices regarding the personal information you provide to us;
  • the use of cookies on Battlefront Miniatures websites and how you can reject cookies.

Battlefront Miniatures is committed to safeguarding your personal information. Whenever you provide such information, we are legally obliged to use your information in line with all applicable laws concerning the protection of personal information. No website can be completely secure; if you have any concerns that your Battlefront Miniatures account could have been compromised e.g. someone could have discovered your password, please get in touch straight away.

Battlefront Miniatures websites contain hyperlinks to websites owned and operated by third parties. These third party websites have their own privacy policies, and are also likely to use cookies, and we therefore urge you to review them. They will govern the use of personal information you submit when visiting these websites, which may also be collected by cookies. We do not accept any responsibility or liability for the privacy practices of such third party websites and your use of such websites is at your own risk.

2. What information will Battlefront Miniatures collect about me?

When you participate in, access or sign up to any of Battlefront Miniatures’ services, activities or online content, such as newsletters, competitions, message boards, web and mobile notifications, telephone, or create an account using Battlefront Miniatures’ online registration system we may receive personal information about you. This can consist of information such as your name, email address, postal address, telephone or mobile number, as well as information collected about your use of Battlefront Miniatures services.

Please note that sometimes we will require you to provide additional personal information, and sometimes sensitive personal information (e.g. if you’re placing an order for product, we may collect credit card and address information).

3. How will Battlefront Miniatures use the information it collects about me?

Battlefront Miniatures will use your personal information for a number of purposes including the following:

  • to provide our services, activities or online content, to provide you with information about them and to deal with your requests and enquiries;
  • for ” administration purposes”, which means that Battlefront Miniatures may contact you for reasons related to the purchases, services or online content you have signed up for, as set out in section 4 below (e.g. to provide you with password reminders, to notify you that a particular service, activity or online content has been suspended for maintenance, to notify you of updates to our Privacy and Cookies Policy or Terms of Use);
  • we do not share personal data with 3rd parties without your express permission;
  • to contact you about a submission you have made, including any content you provide. For additional information, please see the Terms of Use;
  • to use IP addresses and device identifiers to identify the location of users, to block disruptive use and to establish the number of visits from different countries;
  • we may also use and disclose information in aggregate (so that no individuals are identified) for marketing and strategic development purposes; and

4. Your Battlefront Miniatures Account

If you have registered for a Battlefront Miniatures account this might also allow you to login to other Battlefront Miniatures sites and services. These services might be run by the Battlefront Miniatures or they could be run by Gale Force Nine LLC, or appear under the brand names Flames of War or Team Yankee, or a combination of these. To provide you with a seamless experience, it may be necessary to share your personal information between these organisations. We will only share what we need to internally in order to provide the service you are using – we will never routinely share all of the data we each hold about you.

Your Battlefront Miniatures account will always be covered by the policies of this website. But, please be aware that additional policies may apply if your Battlefront Miniatures account is linked to another account.

5. When will Battlefront Miniatures contact me?

Battlefront Miniatures may contact you:

  • in order to ensure that the Battlefront Miniatures can deliver the services, e.g. to verify your email when you sign up for a Battlefront Miniatures account, or to help you reset your password;
  • in relation to any correspondence we receive from you or any comment or complaint you make about Battlefront Miniatures products or services;
  • in relation to any personalised services you are using;
  • in relation to any contribution you have submitted to Battlefront Miniatures, e.g. on Battlefront Miniatures message boards or via text or voicemail message;
  • to update you on any material changes to Battlefront Miniatures policies and practices; and
  • for marketing purposes, as set out in section 6.

We will never contact you to ask for your Battlefront Miniatures account password, or other login information. Please be cautious if you receive any emails or calls from people asking for this information and claiming to be from Battlefront Miniatures.

6. Will I be contacted for marketing purposes?

Battlefront Miniatures will only send you marketing emails or contact you on Battlefront Miniatures platforms where you have agreed to this.

We offer regular emails, including a weekly update, to let you know about Battlefront Miniatures products and services.

7. Will the Battlefront Miniatures share my personal information with anyone else?

We will keep your information within Battlefront Miniatures except where disclosure is required or permitted by law (for example to government bodies and law enforcement agencies, including for child protection reasons) or as described in this section and section 8.

Generally, we will use your information within Battlefront Miniatures and will only share it outside Battlefront Miniatures where you have requested it or given your consent.

We may share your personal information internally (i.e. with other Battlefront Miniatures divisions), for example, we share some personal data with Gale Force Nine LLC to allow purchases of their product lines. Please see section 3 above for more details.

8. Offensive or inappropriate content on Battlefront Miniatures websites

If you post or send content which may reasonably be deemed to be offensive, inappropriate or objectionable anywhere on or to Battlefront Miniatures websites or otherwise engage in any disruptive behaviour on any Battlefront Miniatures service, Battlefront Miniatures may remove such content.

Where Battlefront Miniatures reasonably believes that you are or may be in breach of any applicable laws, for example on hate speech, Battlefront Miniatures may disclose your personal information to relevant third parties, including to law enforcement agencies or your internet provider. Battlefront Miniatures would only do so in circumstances where such disclosure is permitted under applicable laws, including data protection law.

9. How long will Battlefront Miniatures keep my information?

We will hold your personal information on our systems for as long as is necessary for the relevant activity, or as long as is set out in any relevant contract you hold with Battlefront Miniatures. If you delete your Battlefront Miniatures account then your personal information will be deleted provided no monies are owing, and the remaining information is anonymised for analytical purposes. For further information about deleting your Battlefront Miniatures account, please see section 10 below.

Where you contribute content together with your personal information (User Generated Content or UGC) please refer to our Terms of Use for further information about how long we may store such material.

If you have not used your Battlefront Miniatures account in the last year then your account may be classed as dormant or may be deleted in line with this privacy policy.

10. Can I find out what personal information Battlefront Miniatures holds about me?

You have the right to request a copy of the personal information Battlefront Miniatures holds about you and to have any inaccuracies corrected. We will use reasonable efforts consistent with our legal duty to supply, correct or delete personal information about you on our files. If you are within the UK, please address requests and questions about this or any other question about this Privacy and Cookies Policy to [email protected].

11. Web browser cookies

a) What is a Cookie?

A cookie is a small amount of data, which often includes a unique identifier that is sent to your computer, tablet or mobile phone (all referred to here as a “device”) web browser from a website’s computer and is stored on your device’s hard drive. Each website can send its own cookie to your web browser if your browser’s preferences allow it. Many websites do this whenever a user visits their website in order to track online traffic flows. Similar technologies are also often used within emails to understand whether the email has been read or if any links have been clicked. If you continue without changing your settings, we’ll assume that you are happy to receive all cookies on the Battlefront Miniatures website.

On Battlefront Miniatures websites, cookies record information about your online preferences and allow us to tailor our websites to your interests.

During the course of any visit to a Battlefront Miniatures website, the pages you see, along with a cookie, are downloaded to your device. Many websites do this, because cookies enable website publishers to do useful things like find out whether the device (and probably its user) has visited the website before. This is done on a repeat visit by checking to see, and finding, the cookie left there on the last visit.

b) How does Battlefront Miniatures use cookies?

Information supplied by cookies can help us to understand the profile of our visitors and help us to provide you with a better user experience. It also helps us recognise when you are signed in to your Battlefront Miniatures account and to provide a more personalised experience.

c) Third party cookies in embedded content on Battlefront Miniatures pages

Please note that during your visits to Battlefront Miniatures websites you may notice some cookies that are not related to Battlefront Miniatures.

To support our hobby, we sometimes embed content from social media and other third party websites. These may include YouTube, Twitter, Facebook, Instagram, Pinterest and Flickr. As a result, when you visit a page containing such content, you may be presented with cookies from these websites and these third party cookies may track your use of the Battlefront Miniatures website. Battlefront Miniatures does not control the dissemination of these cookies and you should check the relevant third party’s website for more information. If you continue without changing your settings, we’ll assume that you are happy to receive all cookies on the Battlefront Miniatures website.

Where Battlefront Miniatures embeds content from social media and other third party websites, some websites may use Google Analytics to collect data about user behaviour for their own purposes. Battlefront Miniatures does not control this. For more information, see the Google webpage “How Google uses data when you use our partners’ sites or apps”.

d) Battlefront Miniatures cookies

Battlefront Miniatures uses cookies to present purchasing information based on the customer’s region to set currencies and calculate shipping rates.

e) Other information collected from web browsers

Your web browser may also provide Battlefront Miniatures with information about your device, such as an IP address and details about the browser that you are using. We use information provided by your browser or by the link that you have clicked to understand the webpage that directed you to Battlefront Miniatures and this may be captured by performance cookies.

If you have any concerns about the way that we use cookies or respect your settings, then please contact us.

12. Changes to the Battlefront Miniatures Privacy and Cookies Policy

This Privacy and Cookies Policy may be updated from time to time so you may wish to check it each time you submit personal information to Battlefront Miniatures. The date of the most recent revisions will appear on this page. If you do not agree to these changes, please do not continue to use Battlefront Miniatures websites to submit personal information to Battlefront Miniatures. If material changes are made to the Privacy and Cookies Policy, for instance affecting how we would like to use your personal information, we will provide a more prominent notice (including, for certain services, email notification of Privacy Policy changes).

13. Contacting Battlefront Miniatures about this Privacy and Cookies Policy

If you any questions or comments about this Privacy and Cookies Policy please contact [email protected]


Posted on

Learn To Play

We are currently working on a Learn To Play Guide to help you learn the basics of ‘Nam as quickly and easily as possible, stand by soldier it is coming soon!

If you have already played Team Yankee or Flames Of War (V4) then you will find your first tour of ‘Nam just as easy and intuitive as these other rules sets from Battlefront.

For the cherries among you, don’t worry we will have a comprehensive guide for you soon.

Posted on

ZSU-57-2 (VPA161) Spotlight

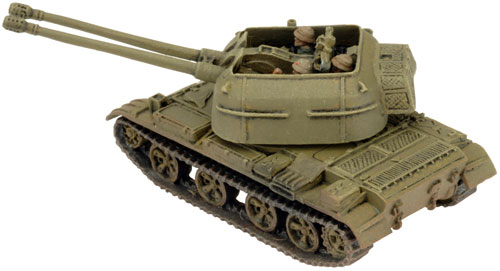
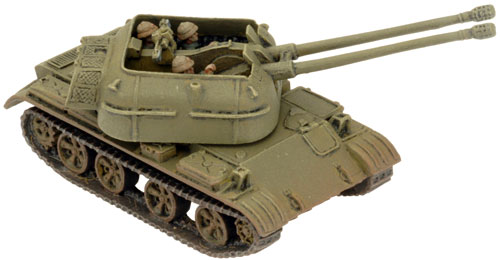
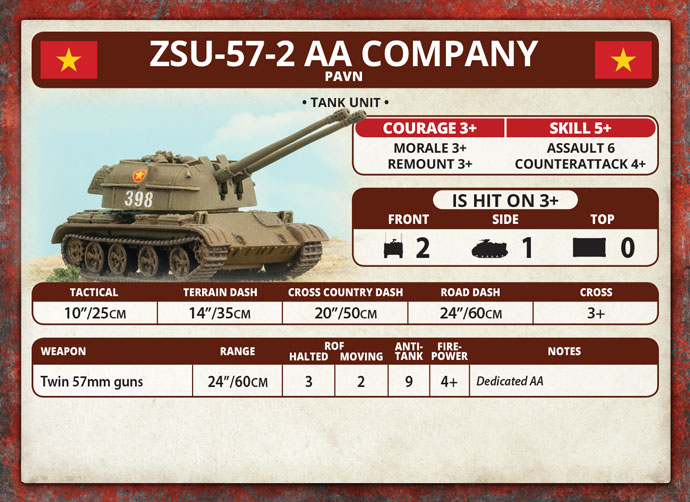
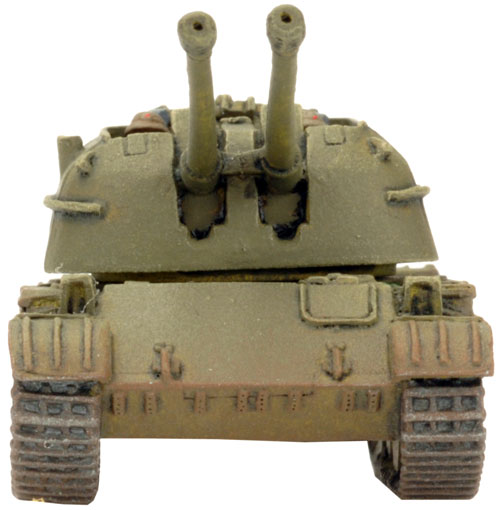
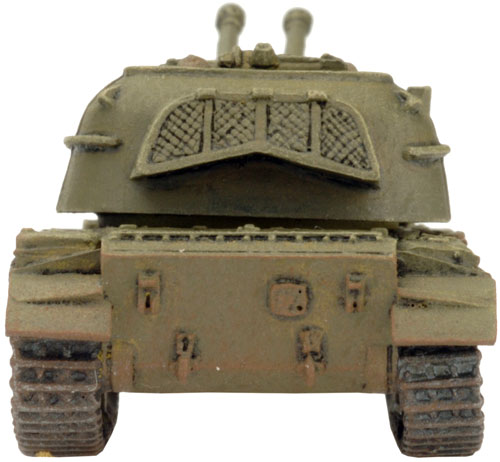
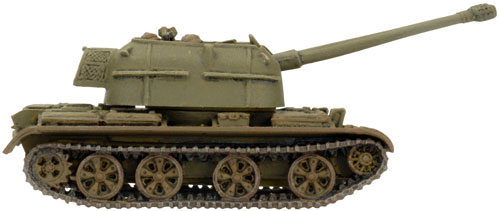
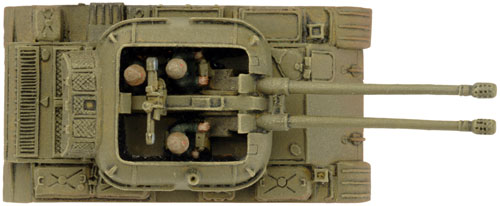
ZSU-57-2 Anti-air Company (VPABX05) includes one ZSU-57-2 SP Anti-aircraft gun and one PAVN head sprue

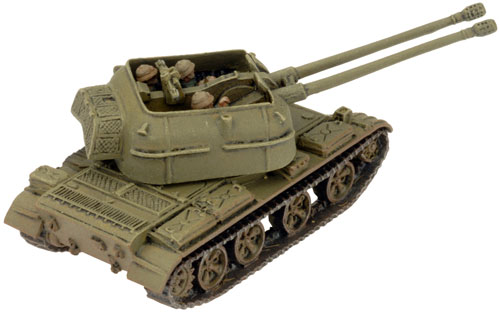
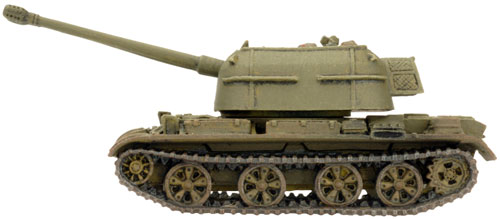
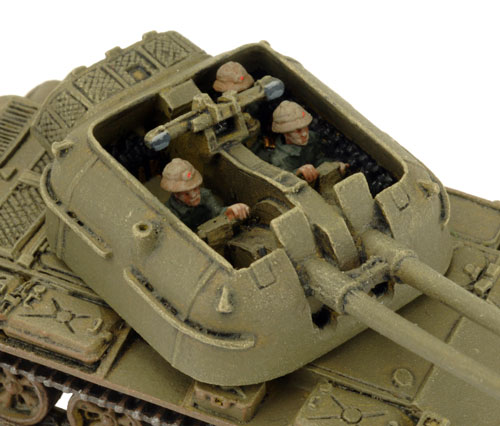
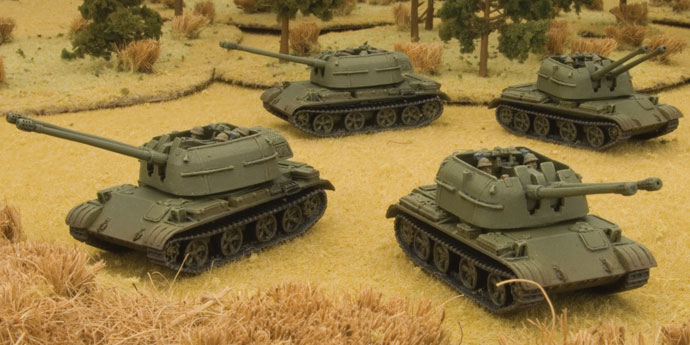
The ZSU-57-2 was a Soviet-built self-propelled anti-aircraft gun that first came into service with the Red Army in 1955. The acronym ZSU stands for Zenitnaya Samokhodnaya Ustanovka, which when translated means anti-aircraft self-propelled mount; 57 designates the calibre of the weapons and 2 states the number of gun barrels.

Check out the ZSU-57-2 SP Anti-aircraft Gun in the online store here…

Built on the chassis of the T-54 tank, the twin S-68 57mm cannons were mounted in an open-topped turret which only offered the crew inside a minimum level of armour protection. Manned by a crew of six (driver, commander, gunner, dedicated sight adjuster and a pair of loaders), the ZSU-57-2 was limited to only engaging aircraft that the crew could actually see.  Once an aircraft was spotted, the sight adjustor had to correctly calibrate the gun sight before the target could be engaged; making the vehicle virtually useless during nighttime operations.
ZSU-57-2 ZSU-57-2
The war in Vietnam was the first recorded service for the ZSU-57-2 in a combat zone. But the North Vietnamese quickly learnt that the ZSU-57-2 was just as effective in providing fire support for infantry attacks as it was sweeping the air of enemy aircraft.

Designed by Evan Allen
Painted by Blake Coster
ZSU-57-2 ZSU-57-2
The ZSU-57-2 in ‘Nam
 ZSU-57-2
ZSU-57-2 ZSU-57-2
ZSU-57-2 ZSU-57-2
The ZSU-57-2 anti-aircraft tank is the chassis of a T-54 battle tank mounting twin 57mm anti-aircraft guns in an open-topped turret. Its rate of fire makes it deadly to aircraft and helicopters, while its high-velocity, long-barrelled guns punch through light armour with ease.
ZSU-57-2 ZSU-57-2
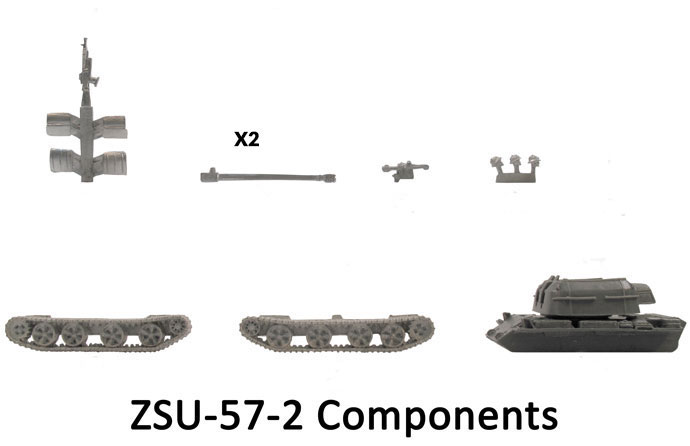
Contents of the ZSU-57-2 Blister
ZSU-57-2
Contact the customer service team at [email protected] if you have any issues with any of the components.
Assembling The ZSU-57-2
Follow the diagram to the below to correctly assemble the ZSU-57-2.
ZSU-57-2


Posted on

M114 155mm Firebase Assembly Guide


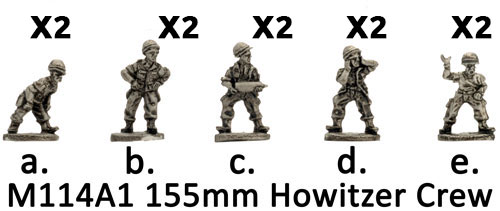
155mm Field Artillery Battery (VUSBX10) The M114A1 155mm Howitzer Crew
Description of Components

a. 2x Standing figures bending over.
b. 2x Standing figures with hands on hips.
c. 2x Loader figures holding shell.
d. 2x Standing figures covering ears.
e. 2x Standing figures with arm raised.
Assembling The M114A1 155mm Howitzer Crew
Simply arrange one of each figure type around each of the M114A1 155mm howitzer to taste. The M114A1 155mm howitzer and crew a modelled on the large six-hole bases provided in the box set.
155mm Field Artillery Battery (VUSBX10)
Description of Components
a. 4x Gun trail wheels.
b. 2x Gun shields / carriages.
c.
 2x Gun carriage stabilisers.
d. 2x Gun barrels.
e. 2x Gun trail legs.
f. 2x Gun trail spades.
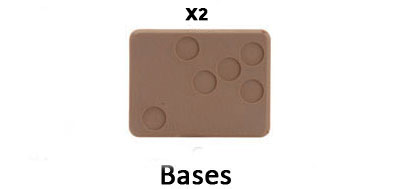
155mm Field Artillery Battery (VUSBX10) The Bases
Description of Components
3x Large six-hole bases.
Assembling The M114A1 155mm Howitzer
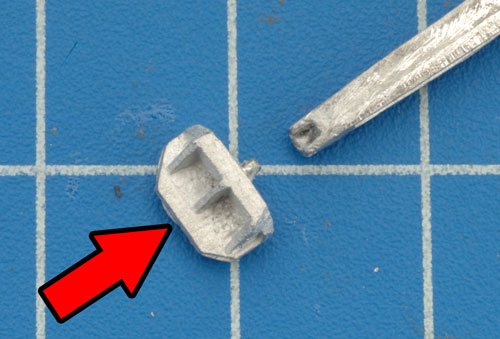
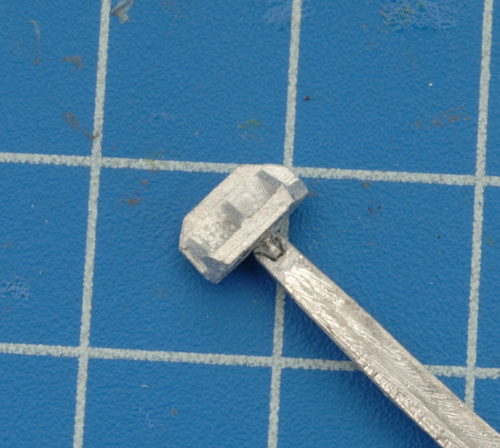
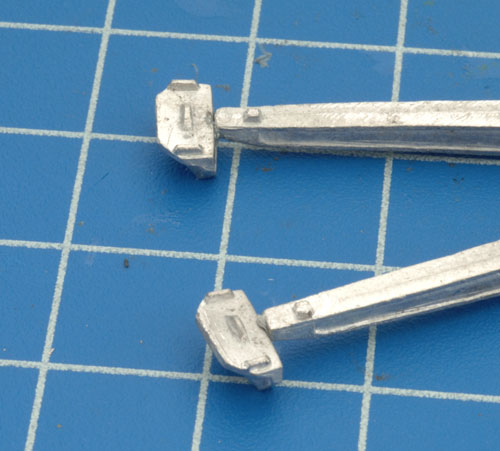
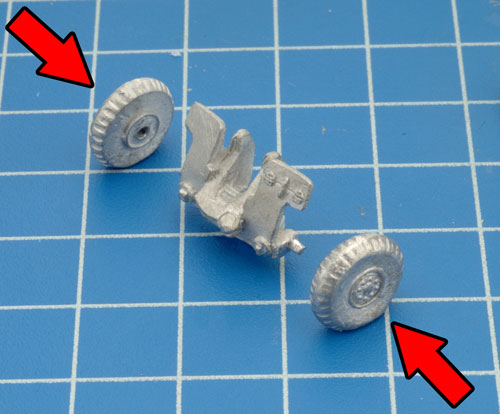
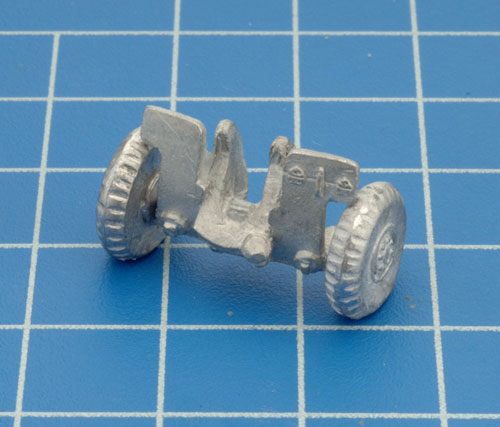
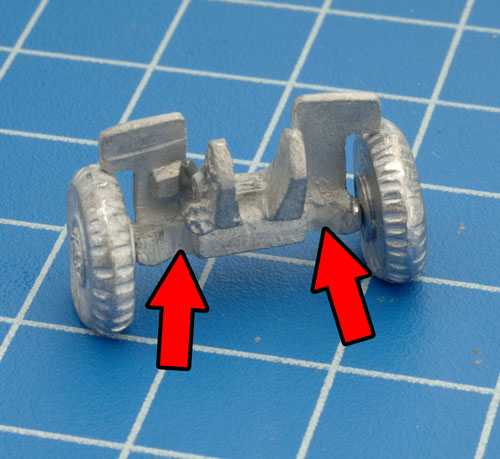
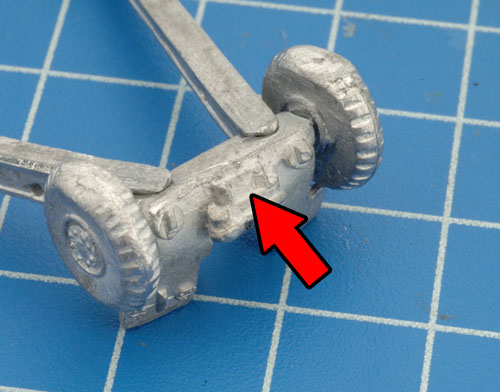
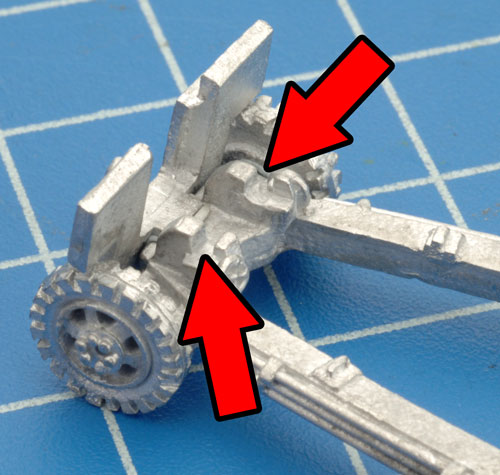
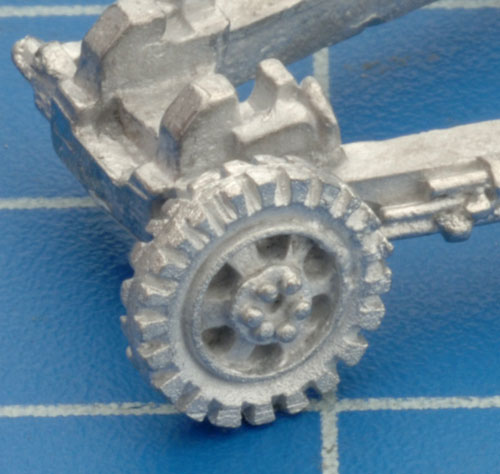
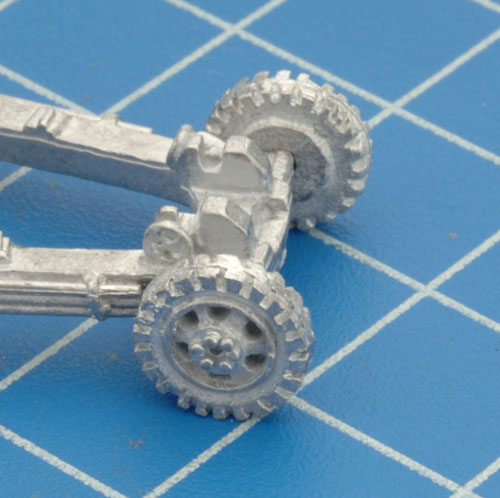
Step 1. Begin assembly of the M114A1 155mm howitzer by attaching the spades to the end of the gun trail legs. Below: Both spades attached to the gun trail legs. Step 2. Next, attach the gun carriage wheels to the sides of the gun shield / carriage.
155mm Field Artillery Battery (VUSBX10) 155mm Field Artillery Battery (VUSBX10) 155mm Field Artillery Battery (VUSBX10) 155mm Field Artillery Battery (VUSBX10)
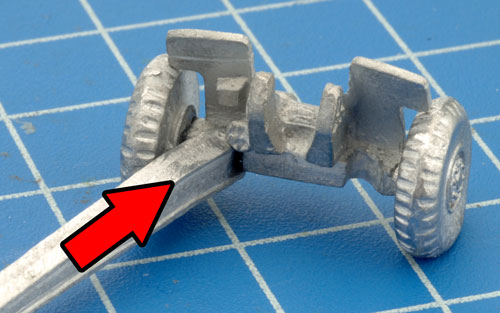
Below: Both gun carriage wheels successfully attached to the gun shield / carriage. Step 3. Next, its time to attach the gun trail legs. The back of the gun shield has been keyed to accept the gun trail legs. Below: Attaching the gun trail leg to the back of the gun shield.
155mm Field Artillery Battery (VUSBX10) 155mm Field Artillery Battery (VUSBX10) 155mm Field Artillery Battery (VUSBX10)
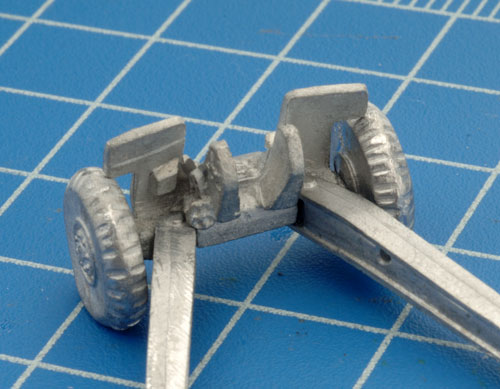
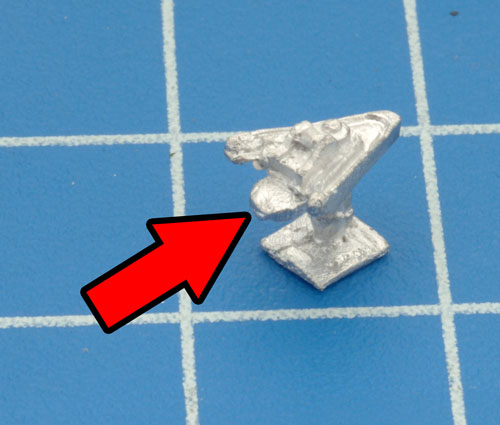
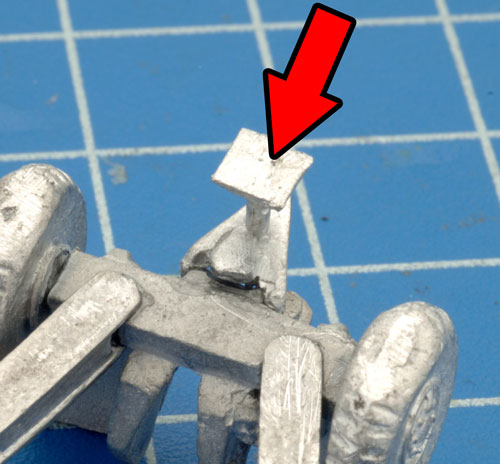
Below: Both gun trail legs successfully attached to the back of the gun shield. Step 4. Next, attach the gun carriage stabiliser to the underside of the gun shield.
155mm Field Artillery Battery (VUSBX10) 155mm Field Artillery Battery (VUSBX10) 155mm Field Artillery Battery (VUSBX10)
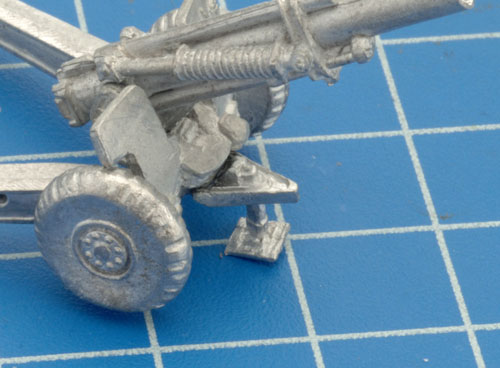
Below: The attached gun carriage stabiliser on the underside of the gun shield. Step 5. Finally, attach the gun barrel to the gun carriage.
155mm Field Artillery Battery (VUSBX10) 155mm Field Artillery Battery (VUSBX10) 155mm Field Artillery Battery (VUSBX10)
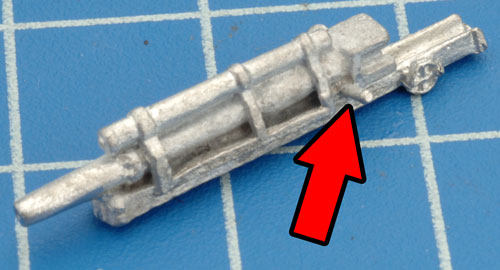
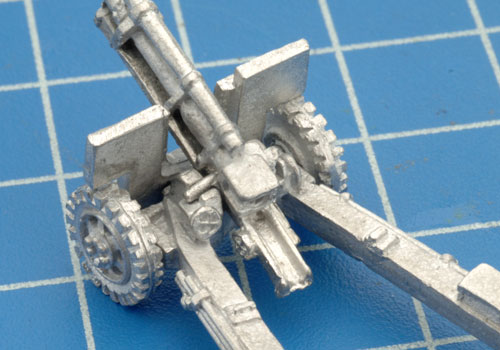
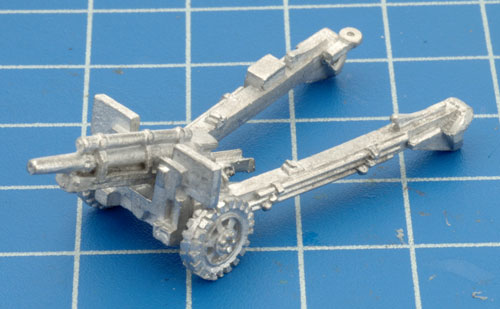
Below: The gun barrel attaches to the gun carriage just behind the recuperator cylinder. Below: With the gun barrel in place the M114A1 155mm howitzer is ready to be painted.
155mm Field Artillery Battery (VUSBX10) 155mm Field Artillery Battery (VUSBX10) 155mm Field Artillery Battery (VUSBX10)
Posted on

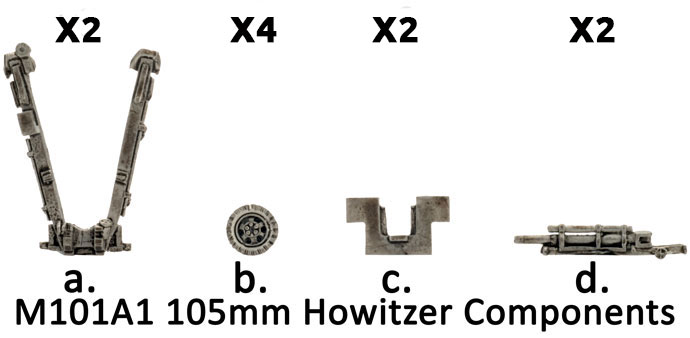
105mm Field Artillery Battery Assemby


Description of Components
105mm Field Artillery Battery (VUSBX09) The M101A1 105mm Howitzer Crew
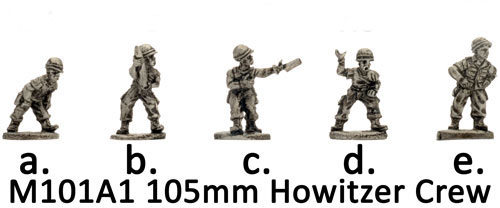
Description of Components

a. 2x Standing figures bending over.
b. 2x Loader figures holding shell.
c. 2x Loader figuers discarding spent shell case.
d. 2x Standing figures with arm raised.
e. 2x Standing figures with hands on hips.
Assembling The M101A1 105mm Howitzer Crew
Simply arrange one of each figure type around each of the M101A1 105mm howitzer to taste. The M101A1 105mm howitzer and crew a modelled on the large six-hole bases provided in the box set.
The M101A1 105mm Howitzer
Description of Components

a. 3x Gun trails.
b. 6x Gun trail wheels.
c. 3x Gun shields
d. 3x Gun barrels.
105mm Field Artillery Battery (VUSBX09)
105mm Field Artillery Battery (VUSBX09) The Bases
Description of Components
2x Large six-hole bases.
Assembling The M101A1 105mm Howitzer
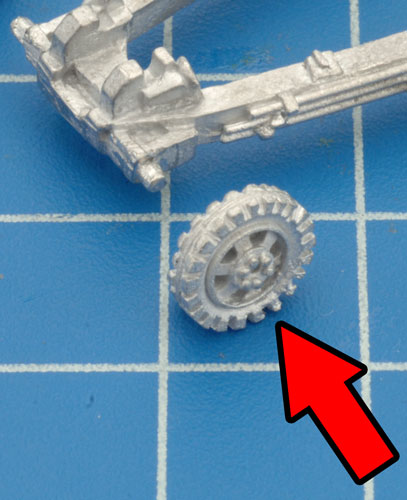
Step 1. Begin assembly by attaching the wheels to the gun trail. Below: The back of the gun shield has a tab that is keyed to the front of the gun trail.
105mm Field Artillery Battery (VUSBX09) 105mm Field Artillery Battery (VUSBX09) 105mm Field Artillery Battery (VUSBX09) 105mm Field Artillery Battery (VUSBX09)
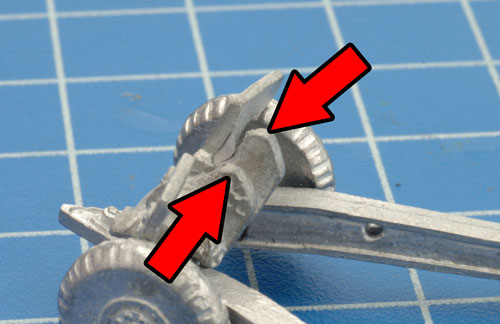
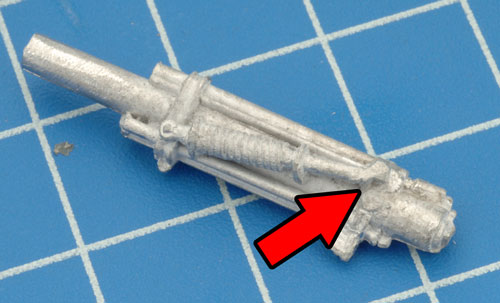
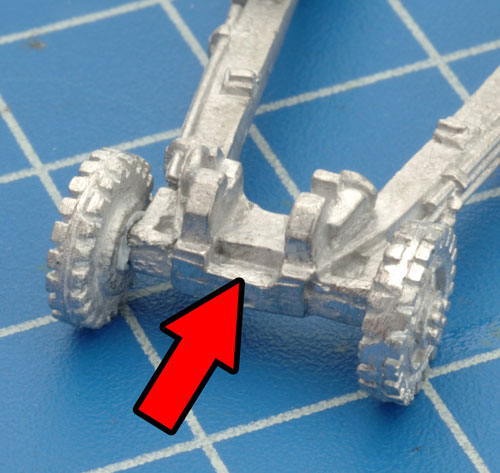
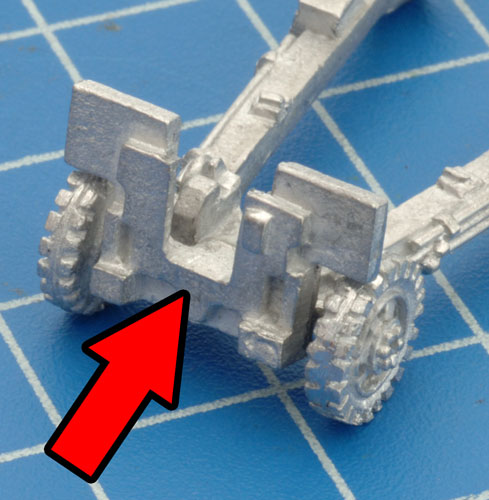
Below: The front of the gun trail has been keyed to accept the gun shield. Step 2. Attach the gun shield to the front of the gun trail. Below: The gun trail has been keyed on either to accept the gun barrel.
105mm Field Artillery Battery (VUSBX09) 105mm Field Artillery Battery (VUSBX09) 105mm Field Artillery Battery (VUSBX09)
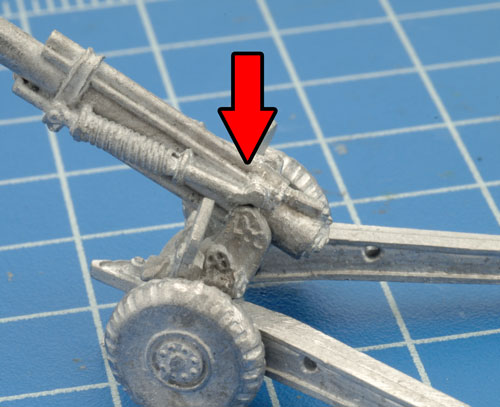
Below: The gun barrel has been keyed to match the gun trail. Step 3. Finally, attach the gun barrel to the gun trail at the desired level of elevation. Below: With the gun barrel in place, the M101A1 105mm howitzer is ready tohit the painting table.
105mm Field Artillery Battery (VUSBX09) 105mm Field Artillery Battery (VUSBX09) 105mm Field Artillery Battery (VUSBX09)
Posted on

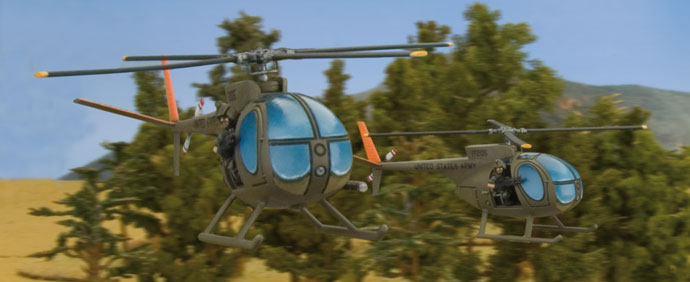
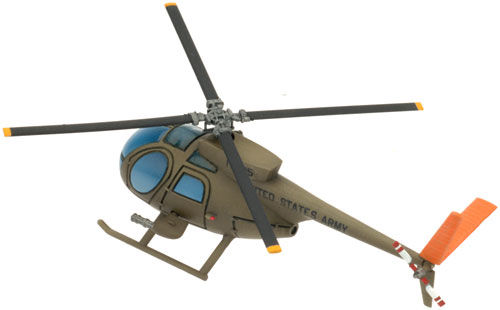
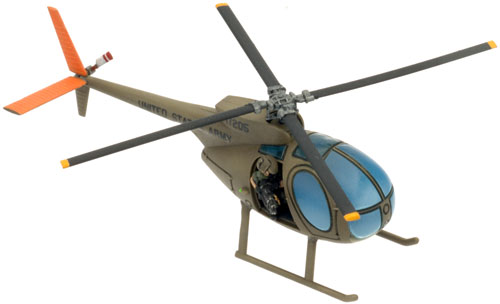
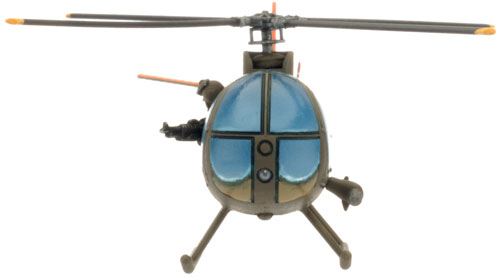
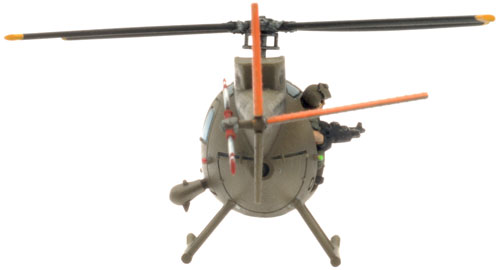
OH-6 Loach Spotlight (VUSBX04)


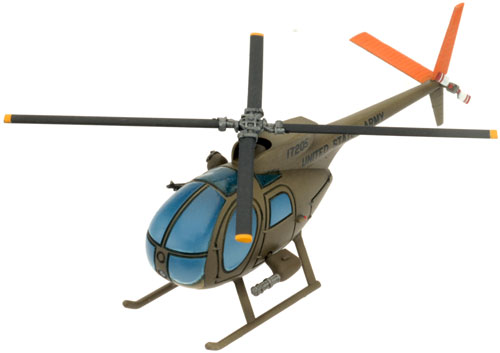
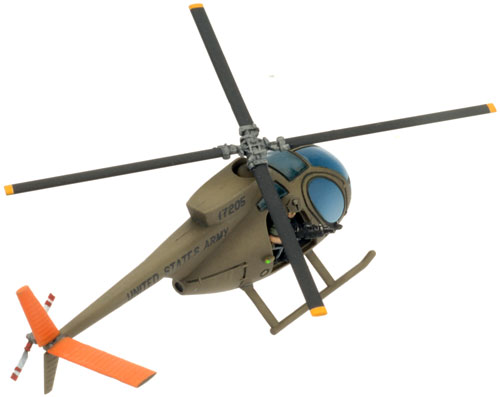
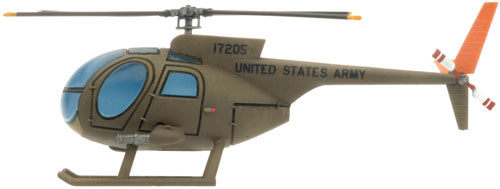
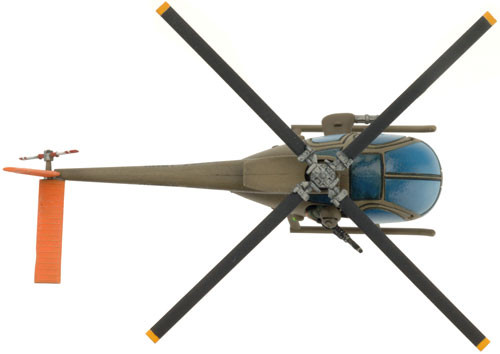
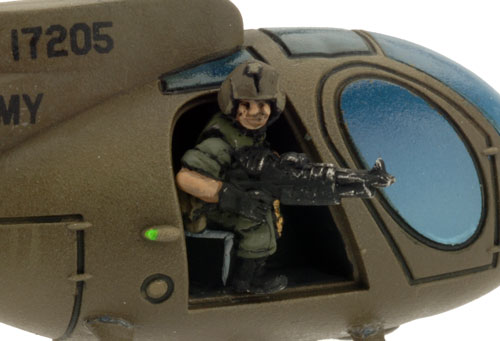
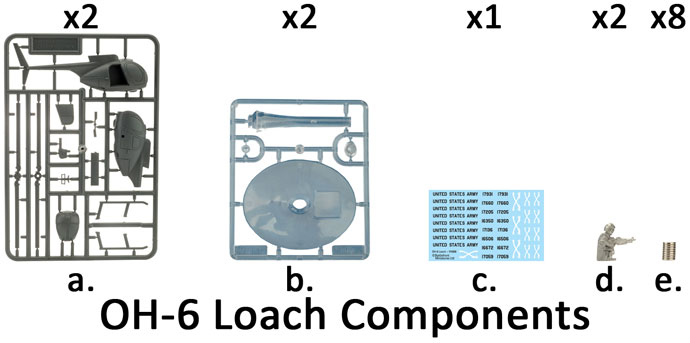
includes two plastic OH-6 Loach sprues, two Door Gunner figures, two plastic Flight Stands, one OH-6 Decal sheet & eight Rare earth magnets.

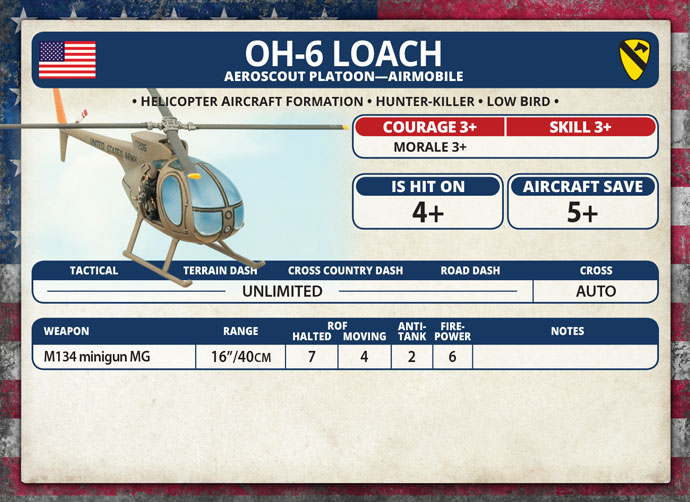
The OH-6 Cayuse was quickly nicknamed the ‘Loach’ after its initial designation LOH (Light Observation helicopter). Its high speed, manoeuvrability, and small size made it an excellent scout helicopter, even though much of its work was done at low speed while flying at or below treetop level.

Check out the OH-6 Loach in the online store here…

Armed with a M134 minigun and a M60 machine-gun, the OH-6 Loach could still deliver a nasty sting of its own.

Designed by Will Jayne
Painted by James Brown

The OH-6 Loach
The OH-6 Loach in ‘Nam
Contents of the OH-6 Loach Box Set
Contact the customer service team at [email protected] if you have any issues with any of the components.
Description of Components
a. 2x Plastic OH-6 Loach component sprues.
b. 2x Plastic flight stands.
c.
1x OH-6 Loach decal sheet.
d. 2x Door gunner figures.
e. 8x Rare earth magnets.
Posted on

US 4.2″ Mortar Platoon Assembly


4.2" Mortar Platoon (VUS717) The 4.2in Mortars & Crew
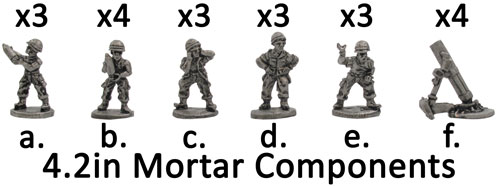
Description of Components
a. 3x Gunner figures loading projectile.
b. 4x Gunner figures holding projectile.
c. 3x Standing figures covering ears.
d. 3x Standing figures with hands on hips.
e. 3x Standing figures with hand in air.
f. 4x M30 4.2in mortar tubes with base plate.
Assembling The 4.2in Mortar Teams
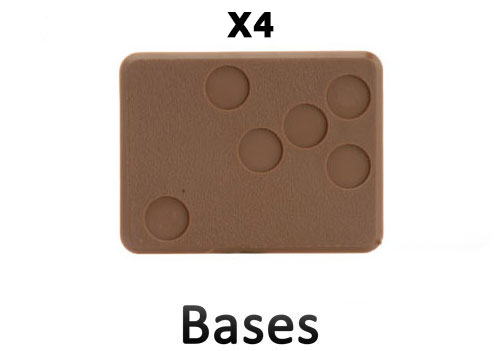
Each 4.2in mortar team consists of one M30 4.2in mortar manned by a four-man crew. The crew consists of one of figure type B with the remaining three crew members made up from a mixture of figure types A, C, D and E. Feel free to use which ever poses you think work best in your mortar teams. The 4.2in mortar teams are based using the large six-hole bases included in the blister pack.
The Bases
Description of Components
a. 1x Small three-hole base.
b. 4x Large six-hole bases.
4.2" Mortar Platoon (VUS717)
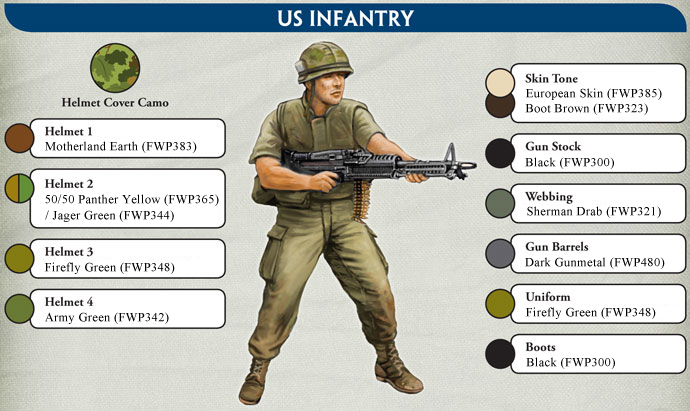
US Infantry Painting Guide
4.2" Mortar Platoon (VUS717)