Posted on

On Marines, Camouflage, and Salty Gear

with Jukka Salonen

When we think of Marines and the Vietnam war, we often picture them in Olive Green battle uniforms and webbing. Tiger-stripe camouflage… The whole works. To a part this is true thing, but there is much more than that. This article is written with the thought that even though Marines are mean and green, there is much more to them, colour-wise, than that.

Camouflage
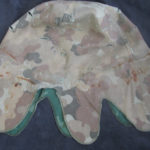
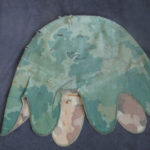
The Marines entered the Vietnam conflict in 1965. When they arrived, they did not have camouflage, except on their helmets. The helmets used the so-called “wine leaf pattern” camouflage helmet cover. It was two sided: Green Brown and a cloudy brown pattern. This pattern was designed originally in 1953, and reminds of the older WWII patterns used in the Pacific theatre. This pattern was only made for helmets and shelter halves and used by both the army and the Marines. It was also copied by private companies in the far east, and along with the cannibalizing of old camouflaged gear, found itself sewn into other gear by custom tailoring.


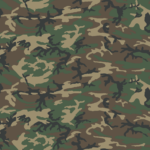
In 1948, the US Army Engineer Research and Development Laboratory, aka. ERDL, designed a new camouflage uniform pattern. This is usually called ERDL camouflage, or just ERDL. A pattern that looks a lot like the later US woodland pattern, which is basically a magnified ERDL print. The clothes with this pattern were doled out in 1967 to special forces and also saw use with ANZAC special troops. But what is important to us is that it was also favored by the US Marines. The camouflage pattern itself was also nicknamed ‘Leaf pattern’ or ‘Flower Power fatigues’. The ERDL existed in a lighter, and darker version, respectively lowland and highland versions. Apparently Marines favored the lighter lowland version.

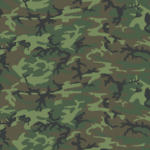
However you decide to paint your troops, remember that clothes received far tougher use than our clothes get. In first-hand stories from different wars, from the Finnish winter war to the war on terrorism in Afghanistan, the pants appear to be the first uniform piece to wear out. So many Marines might just wear the top or the bottom of the ERDL pattern uniform instead of the full set.

But do remember, once the ‘flower power’ fatigues started to be doled out it started to become rarer and rarer to see Marines in green uniforms. By 1970 camouflage uniforms were the standard. Mother Nature’s green killing machines started to blend in.

Salty Gear
Marines liked their gear to look used. Or salty, as they themselves say. Salty means, amongst other things, gear that has seen use and thus gives its wearer an air of being experienced. Older, worn uniforms are also thought to be more comfortable.

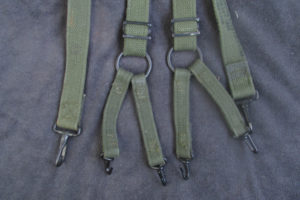
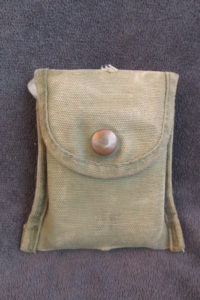
This means the color on the webbing and gear might vary in all the glorious colours of the stained sweated-or-bled-on colour palette. A Marine might have packed even old WWII-era gear just because it was thought of as salty. The original Marine webbing in Vietnam was the old WWII M1945-webbing. But Marine Command had made the nice gesture and added the army WWII shoulder paddings to the original webbing. All pieces were re-coloured before being issued, and apparently, some of it is still stored unused into the present day. At least my original M1956 webbing suspenders of my reenactment kit came to me unused. Later, the Marines started receiving the M1956 webbing used by the army since the early 60s. Later on everybody started receiving the modernized M1967 gear, designed specially for the Vietnam conditions. Canvas rotted in the jungle, and weighed more especially when wet- the M1967 Nylon ones did not have any of these problems.

Webbing

The pistol holsters and knife sheaths were leather, so they should probably be either brown or black or something in between, with black being the more common post-WWII. Even though the Ka-Bar knife’s sheath is mostly brown, leather becomes more and more black when it meets sweat and mud. Pistol holsters seem to have been black at this point, but brown was the usual color in the previous conflicts. The boots were black, so called ‘jungle boots’ which had green canvas pieces were also used, so there is a challenge for those who want to paint small details.

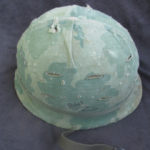
Marines used the leaf pattern helmet cover, but they might also have at times gone without the helmet cover. Similarly, the helmet band was not used in the beginning of the conflict. Early helmets could have had a black band made of the inner tube of a tire. Even when the helmet-band was available it lacked the “cat eyes” reflectors the modern ones have. The helmets were often graffiti clad and could also have foliage added on them, but foliage is rarely seen in photos.

But be the gear old or new, there was always the idea of saltiness. So at least a part of the gear could (or maybe even should?) be painted more worn and scruffy. Also, the colors on the non camouflaged gear seem to have varied a tad, depending on the exact model and make. Quite like the German WWII uniforms you often see the pictures of. Google up for example utility shirts of models P53, P56, P58, and P63, and they all have a different tone of “military green.” So if you don’t have the exact right green tone on a short sleeved shirt. It really is nothing. It might even be white, but insanely dirty in that case. (And now I´m thinking about painting one miniature that way!)

Magazine pouches for the M-14. Note how the colors are worn. 

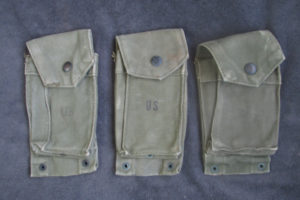
The Marines were also notorious termites. Apparently they traded or “borrowed” gear they were not issued with if they thought they needed it, regardless of their webbing model. So even if the ‘Nam miniatures are kitted out in the new model webbing, one should not be shy to paint an odd pouch in a different color. Or for example an odd piece of pants in an allied force camouflage. Other camouflage patterns could be tiger-stripe, the south-Vietnamese airborne pattern and different blotchy “duck hunter” patterns. But I feel these would be few and far between on regular grunts. So a full grunt platoon in “duck hunter”, would not be plausible, but recon units would be a different waltz all together. They would be kitted mostly in full camouflage. I at least intend to try several patterns mixed out on my recon team.

But before you go all out and start making every figure an exception, with a multitude of different camouflaged gear. STOP! DO NOT! Though there were exceptions, make them here and there. If you make every miniature with a lot of differences, you end up with something looking in the best case like a special forces unit, and in the worst case like a post apocalyptic raider unit.

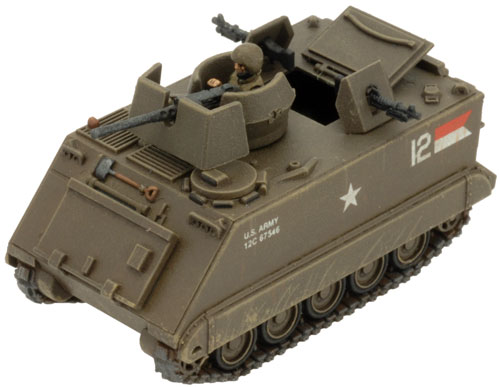
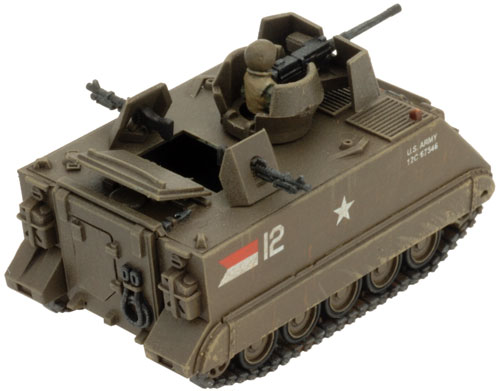
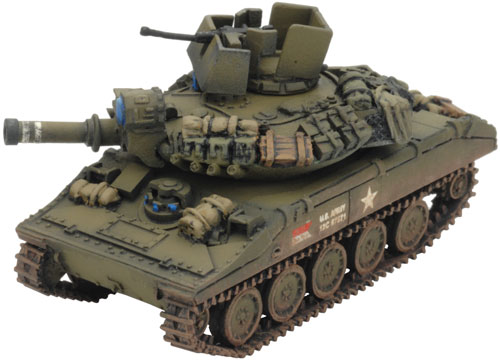
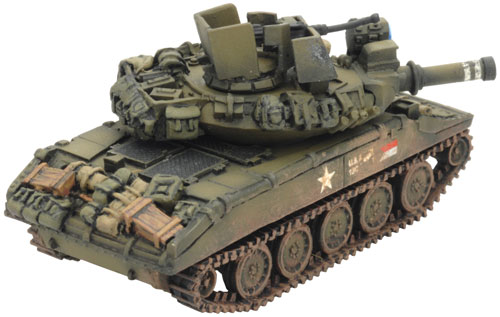
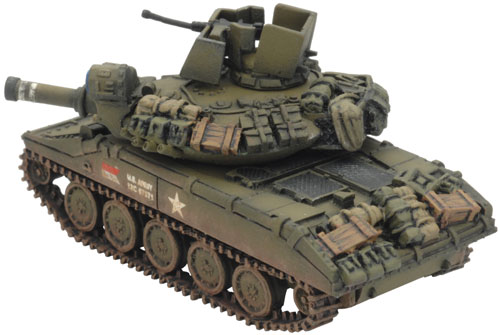
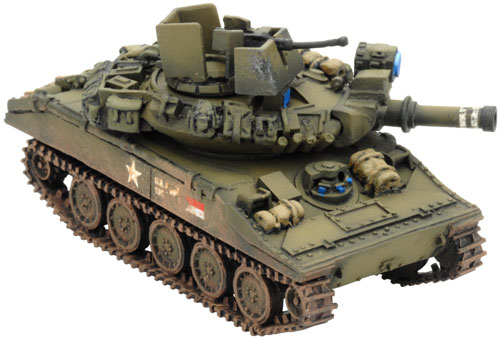
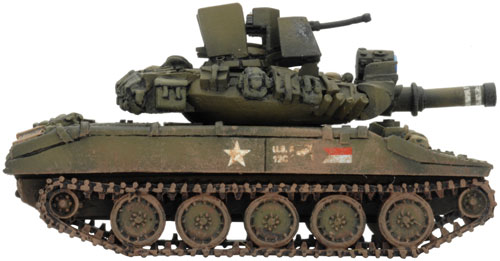
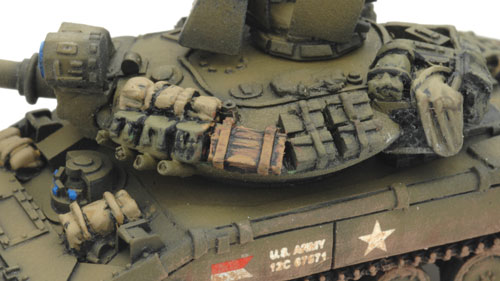
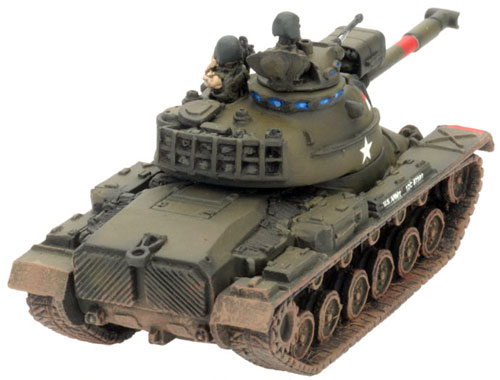
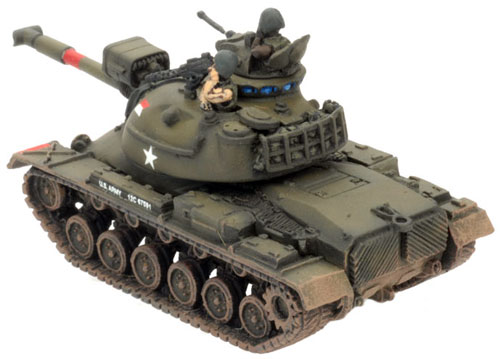
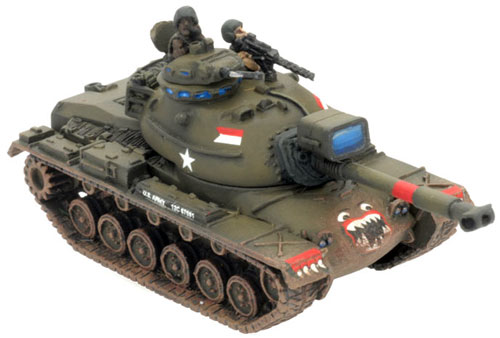
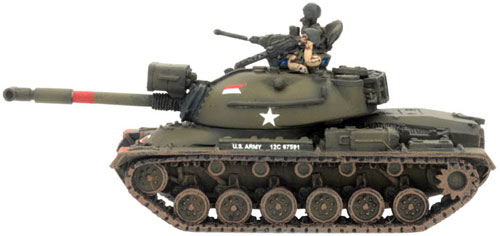
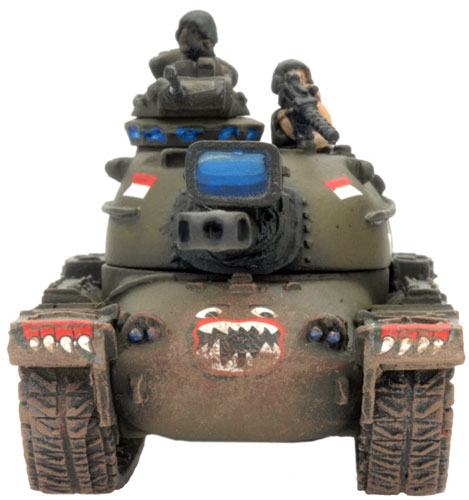
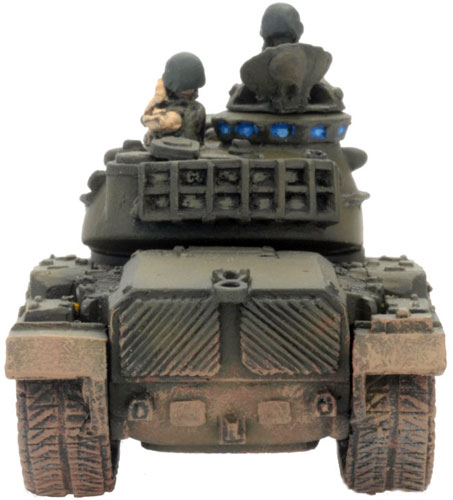
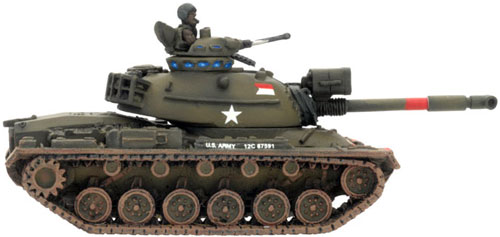
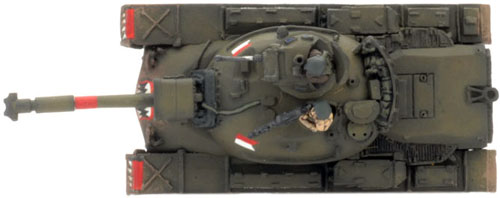
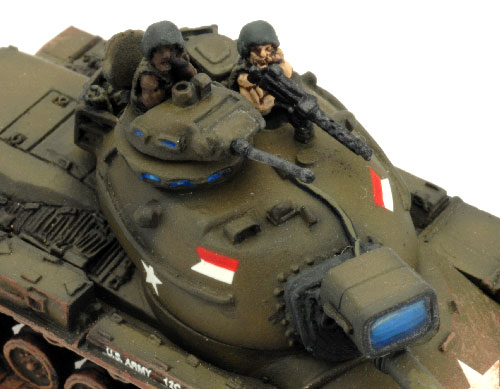
The camouflages mentioned here were worn only by people. Vehicles were all the colourful variations of worn olive drab.

And do not forget the mud and dust. Depending on which movies you have seen, the Vietnam war was muddy or dusty. A light dry brush hinting of mud or dust looks good on boots and the legs of the pants, or even here and there on elbows, bag bottoms… you get the picture.

How Do I Paint It?

So far I have painted only leaf pattern helmets and some odd clothes (even one full leaf pattern uniform.) The lighter version I start with a base of some natural dark green color. After that, I apply blotches of Green Grey, and a handful of stripes in some brown tone. Then I give it a light Black Wash to bring out all the details. And after that, a spider web thin layer of an lightly uneven White dry brush (maybe with a tad Green Grey mixed in if I feel like it) to make it more scruffy looking.


I have not yet painted any darker versions of the vine leaf pattern since I go with the “Vietnam was wet and muggy” version. So I can not give any tested ideas on how to paint. But it is just basically four different sandy color tones, painted in big, cloud-like blotches.

When painting the webbing, I usually make three paint stripes besides each other on the palette. One being Olive Drab, the other being something browner, and the other a lighter tone of the same. I dip the brush in one, and swipe left or right. Mix it together and paint as many webbing details with it, giving all the webbing have a slightly used tone. After that I apply black ink and a light dry brush with White and Brown-Green mix.

Here and there you might add some random things in colors from the US WWII late war painting guides to give it more variance, and do not forget the grenades. They were mostly olive drab, with a yellow stripe. Sometimes the rifles also had some kind of camouflage stripes on them. It was mostly a special forces thing, and there it seems to me to be mostly an ANZAC thing. But one or two rifles in a platoon would not look, to me, out of place.

As a conclusion I could say that if you are not sure what color something should have, paint it Olive Drab or Olive Green. And then dry brush it to make it look salty.

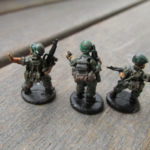
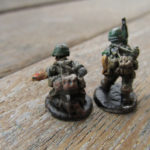
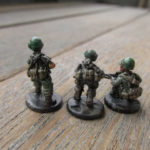
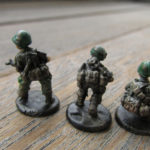
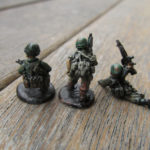
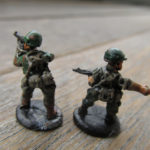
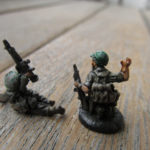
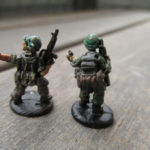
On the more exotic ideas, the field is yours to try out. Be sure to post pictures of them, and I’ll leave you with a few photographs of what I’ve gotten done so far.

Sources:
Osprey publishing. Warrior 23. US Marine Rifleman in Vietnam 1965-1973. Melson, Bujeiro.
Osprey Publishing. Battle Orders 19. The US marine corps in the Vietnam war. Gilbert. Anderson.
http://camopedia.org
Vietnamgear.com
I also would like to thank the Terminal Lance webcomic, on helping me understand better the many faceted USMC sub-culture.

Extras For Experts
Battlefront Studio Painter Aaron also recommended a few videos for those who want to check out more ‘Nam gear for information or inspiration:

Posted on

Airmobile Air Cavalry Troop Army Deal (VUSAB01) Spotlight

Airmobile Air Cavalry Troop (VUSAB01) Contains two plastic AH-1 Hueycobras, two plastic UH-1 Slicks, two plastic OH-6A Loachs, three M60 MG teams with M72 LAW and three decal sheets.

The ‘Skysoldiers’ of the 1st Cavalry Division (Airmobile) proved the concept of an entirely airmobile division to be not only feasible, but also highly effective against elusive guerilla forces in Operations All the Way and Silver Bayonet. Their unparalleled mobility allowed them to locate and engage the Vietnamese B3 Front in a series of battles in the Pleiku area of the Western Highlands culminating in the Battle of Ia Drang.

Check out The Airmobile Cavalry Troop in the Online Store…

Airmobile Air Cavalry Troop (VUSAB01)
AH-1 Hueycobra Helicopter (plastic) (x2)
Airmobile Air Cavalry Troop (VUSAB01)
OH-6 Loach Helicopter (plastic) (x2)
Airmobile Air Cavalry Troop (VUSAB01) Airmobile Air Cavalry Troop (VUSAB01)
UH-1 Slick Helicopter (plastic) (x2)
Airmobile Air Cavalry Troop (VUSAB01)
M60 MG Team With M72 LAW (x3)
Airmobile Air Cavalry Troop (VUSAB01)

Decal Sheets
Airmobile Air Cavalry Troop (VUSAB01) Airmobile Air Cavalry Troop (VUSAB01)
Airmobile Air Cavalry Troop (VUSAB01)

The Airmobile Air Cavalry Troop In ‘Nam
Airmobile Air Cavalry Troop (VUSAB01) Airmobile Air Cavalry Troop (VUSAB01)

The Airmobile Air Cavalry Troop In ‘Nam
Airmobile Air Cavalry Troop (VUSAB01)


Posted on

Black Horse Armored Cavalry Troop Army Deal (VUSAB02) Spotlight

Black Horse Armored Cavalry Troop Army Deal (VUSAB02) Contains seven plastic M113 Armored Personnel Carriers, three M551 Sheridan Tanks, one M48 Patton Tank and two Decal Sheets.

The 11th Armored Cavalry, known as the ‘Blackhorse’ Regiment, developed radically new tactics to combat an elusive and determined enemy. Conventional wisdom asserted that armour had little to no role to play in the jungles, deltas, and rough terrain of Vietnam. The Blackhorse Regiment proved conventional wisdom wrong. The regiment’s unofficial motto, ‘Find the bastards, then pile on’, embodied their tactics for a highly mobile and heavily armed combined-arms force to seek out and destroy an unconventional enemy.

Check out the Black Horse Armored Cavalry Troop in the Online Store…

As American involvement in the Vietnam War increased, there was a need for additional combat formations. In March 1966 the 11th Armored Cavalry Regiment was ordered to Vietnam. In preparation, the regiment made a series of modifications to their equipment and organization to better fight a guerrilla war. Feedback from Vietnamese Armoured Cavalry Regiments suggested that neither the jeeps nor the M114 reconnaissance carriers that Blackhorse had were of much use in Vietnam. Both were replaced with the larger, more mobile and better-protected M113 armoured personnel carrier (APC).
Black Horse Armored Cavalry Troop Army Deal (VUSAB02)
M113 Armored Personnel Carriers (x7)
M551 Sheridan (x3)
M48 Patton (x1)

Black Horse Armored Cavalry Troop Box Contents
Contact the customer service team at [email protected] if you have issues with any components.
M113 Sprue (x7)
Black Horse Armored Cavalry Troop Army Deal (VUSAB02)
M551 Sheridan Tanks (x3)
Black Horse Armored Cavalry Troop Army Deal (VUSAB02)
M48 Patton Tank (x1)
Black Horse Armored Cavalry Troop Army Deal (VUSAB02)

Decal Sheets

The Black Horse Armored Cavalry Troop In ‘Nam

Assembling Black Horse Armored Cavalry Troop

Assembling the M113

Assembling the M48 Patton

Black Horse Armored Cavalry Troop Army Deal (VUSAB02) Black Horse Armored Cavalry Troop Army Deal (VUSAB02)

Assembling the M551 Sheridan

Black Horse Armored Cavalry Troop Army Deal (VUSAB02)


Posted on

Props Forever! The Skyraider In Vietnam

with Mike Haught & Phil Yates

Few aircraft have the raw firepower and durability of the Douglas A-1H Skyraider. Derided for being a propeller-driven aircraft in the new Jet Age, the ‘Spad’ not only demonstrated that it had a mission to accomplish, it proved that there was still a place for ‘slow movers’. The Skyraider’s legacy paved the way for powerful modern attack aircraft like the venerable A-10 Warthog.

Look more about the Skyraider in ‘Nam here…
Check out the Skyraider in the online store here…

When I was young I was obsessed with the four-engined B-17 bomber from World War II. I built countless models of the famous bomber, drew doodles of B-17s bombing factories on my school papers, and was mesmerized by getting to see the Commemorative Air Force’s B-17G ‘Sentimental Journey’ up close and personal for the first time. To this day I still love that aircraft. It was rugged, powerful, and had an impressive arsenal. So when my dad told me that the AH-1 Skyraider, a single seat Navy dive bomber, could deliver the same payload as a B-17 (8000lbs or 3600kg of ordnance), I was amazed and instantly made it one of my favourite aircraft.

Development
During World War II, the US Navy needed to replace its aging Dauntless dive-bomber. The Douglas Aircraft company went to work developing a replacement. After a few false starts and fierce competition from aircraft-designer rivals such as Boeing and Curtis, Douglas produced the magnificent XBT2D-1, which was quickly nicknamed the Dauntless II.

The Dauntless II first took to the air on 18 March 1945 and its trial flights greatly exceeded the Navy’s expectations and blew away all of the competing airframes. It was powerful, rugged, and extremely easy to maintain. The Navy instantly ordered nearly 600 planes and designated the plane as the AD-1 Skyraider in February 1946.

The airframe was incredibly rugged and could carry up to 8000lbs (3600kg) of ordnance, the equivalent or superior to many of its contemporary bombers. The plane’s fuel capacity meant that it could spend up to 10 hours in the air, meaning it could stay on station and help local troops for a very long time. It also had a pair of 20mm cannons, one in each wing to offer additional firepower.

Operational History
The Skyraider entered seamlessly into the Navy’s service. A few structural problems were ironed out and the aircraft became a quick favourite for the pilots. The Skyraider’s remarkable and versatile payload also appealed to the US Marines who also used the aircraft to support its strike forces.

Korea
The AD-1’s first combat action was over Korea in 1950-1953. The plane’s heavy payload far exceeded what the jets of the time could deliver, and so were used as the primary ground-attack aircraft of the Navy and Marines. The AD-1 earned the nickname ‘Able Dog’ after sterling service in the Korean War.
During the war several new variants were developed, including early-warning, submarine-hunting, and the up-armed AD-4 with two more 20mm cannon added for a total of four. Over 1050 AD-4 aircraft were built. Following the war, the AD-4 was again updated as the AD-6, which received a more powerful engine, added armour protection for the pilot, and was made capable of delivering nuclear weapons. Over 710 AD-6 Skyraiders were built and saw service in the Navy, Marines, and the Air Force.In 1962, the AD-6 was renamed the A-1H and soon took on the nickname ‘Spad’, a derogatory reference to the fact that it was a propeller aircraft in the jet age. However, the Spad was about to prove its worth once more in Southeast Asia.
Vietnam
In the early days of the US involvement in the Vietnam conflict, the Geneva Convention forbid the US military to use jet aircraft in a military role. Enter the Skyraider! The powerful aircraft served the Air Force and Navy well for those first few months until the restriction was lifted and the more powerful bombers were brought online. However, that was not the end of the Spad’s career in Vietnam. It had a lot more still to offer.
As the years wore on, the Skyraider became a ubiquitous weapon in the US military’s arsenal. Its 15 hard points under its wings could carry and deliver an assortment of torpedoes, mine dispensers, minigun pods, white phosphorous bombs, high explosive rockets, 500lb bombs, cluster bombs, and napalm. The aircraft’s own 20mm cannon could unload a further 800 rounds. Each aircraft was an army unto itself. Its slow speed was an asset because it allowed the aircraft to deliver its weapons on target with excellent accuracy. Jet attack planes were sometimes too fast to deliver accurate strikes, making the Skyraider better suited for close air support.Skyraider ground attack missions included preparing landing zones for helicopters, supporting friendly infantry, covering rescue operations, disrupting known North Vietnamese supply lines, and whatever else asked of it. If a pilot completed his mission and still had ordnance left, he would radio the local friendly forces and get a target to spend the last of his payload. Never did a Skyraider return to base or the aircraft carrier with ordnance still remaining! They became a major and vital part of the Vietnam War.Towards the late 1960s, the Skyraider was slowly (and reluctantly, according to many Spad pilots) replaced by the new A4 Skyhawks and A6 Intruder jet attack aircraft. However, there were always missions that the Skyraider could do best. The aircraft soldiered on in US service until the last one was removed from active duty in 1972. However, a good number of Skyraiders were given to the South Vietnamese air force, which made use of them until the conclusion of the war.
6-Million Pounds Later…
In October 1965, the USS Midway was scheduled to deliver the six-millionth pound of ordnance on Vietnam. To mark the occasion, the crew and pilot, Commander Clarence W. Stoddard, arranged for a special bomb to be dropped: a toilet!The toilet was rigged with a bomb rack, tailfins and nose fuse. It was dropped over a target in South Vietnam and the local Forward Air Controller reported that it whistled all of the way down before crashing into the ground below!
A New Era
The passing of the Skyraider from the US military marked the end of the noble lineage of propeller-driven carrier-based attack aircraft and the full takeover of the jet. However, the transition was not without problems and after years of trying to get attack jets to work, the aircraft designers went back to the Skyraider for inspiration for its next generation of ground support aircraft. The experience of the slow, powerful, and rugged Skyraider would be incorporated into the Republic A-10 Thunderbolt II, blending the best the Skyraider had to offer with modern jet technology.
~ Mike.


Posted on

ASPB (Assault Support Patrol Boat) Assembly

ASPB (VUSBX15) Assembling the ASPB
Follow this guide to correctly assemble your ASPB. For metal and resin models like this one, we recommend you use cyanoacrylate ‘Super Glue’.GF9 Super Glue is available in the online store…
Contact the customer service team at [email protected] if you have any issues with any of the components.
The contents for the ASPB Box Set
Step 1. Begin assembly by glueing the guns to the turrets. Make sure they are facing the correct way. Step 2. Glue the gunner to the 81mm mortar.
ASPB (VUSBX15) ASPB (VUSBX15) ASPB (VUSBX15)
Below. Gunner glued correctly. Step 3. Glue the radar dome into the hole in front of the boat’s pilot house.
ASPB (VUSBX15) ASPB (VUSBX15) ASPB (VUSBX15)
Step 4. Add all the pieces you’ve just assembled into their respective places as seen below.
ASPB (VUSBX15)
And you’re done! Happy modelling.
Posted on

Assault Support Patrol Boat (VUSBX15) Spotlight


ASPB (Assault Support Patrol Boat) (VUSBX15) Includes one Assault Support Patrol Boat boat.

The Assault Support Patrol Boats (ASPB) were known as Alpha boats, owing to the A-designation on their hull numbers. They were the only boat in the MRF purpose built for the riverine mission.

Check out the Assault Support Patrol Boat in the online store here…

The Alpha boat entered service in September 1967 and became known as the Brown Water Navy’s “destroyer”. It was lighter and faster than the Monitor, the MRF’s “river battleship”, but it still packed quite a punch, with two .50-calibre heavy machine guns, 20mm cannon and multipurpose 81mm mortar for indirect fire. Each river division could rely on eight ASPBs to lead patrols upriver.

Designed by Evan Allen
Painted by Aaron Mathie

ASPB (Assault Support Patrol Boat) (VUSBX15)
The Assault Support Patrol Boat ASPB

Length:

50’ 1” (15m)
Beam: 15’ 2” (4.6m)
Draft: 3’ 6” (1m)
Displacement: 58,500lb (26.5 tonnes)
Speed: 16 knots (30km/h)
Crew: 6
The Assault Support Patrol Boat in ‘Nam
ASPB (Assault Support Patrol Boat) (VUSBX15)
ASPB (Assault Support Patrol Boat) (VUSBX15) ASPB (Assault Support Patrol Boat) (VUSBX15)
ASPB (Assault Support Patrol Boat) (VUSBX15)
Posted on

US Monitor Boat Assembly


Monitor (VUSBX13) Assembling the Monitor

Follow this guide to correctly assemble your Monitor. For metal and resin models like this one, we recommend you use cyanoacrylate ‘Super Glue’.GF9 Super Glue is available in the online store…
Contact the customer service team at [email protected] if you have any issues with any of the components.
The contents for the Monitor Box Set
Monitor (VUSBX13)
Step 1. Add the bow to the hull (you don’t have to use glue for this part). Step 2.Glue the pilot’s deck to the hull. Below. Hull assembled correctly.
Monitor (VUSBX13) Monitor (VUSBX13) Monitor (VUSBX13)
Step 3. Glue the guns into their turrets as shown below. (Make sure you don’t glue the 40mm gun into the 20mm gun turrets). Step 4. Glue the hatch cover to each of the the Zippo Flamethrowers.
Monitor (VUSBX13) Monitor (VUSBX13) Monitor (VUSBX13)
Step 5. Next place the Flamethrower onto the gun mount (Ensure you do not glue this part so you can rotate the guns in game.) Step 6. Glue the gunner to the 81mm mortar.
Monitor (VUSBX13) Monitor (VUSBX13) Monitor (VUSBX13)
For your 20mm turrets you have the option of choosing the M2 .50cal turret or the 40mm Grenade turret. The Monitor has three different variants. The CCB Monitor, Zippo Monitor and the Monitor with MK 2 81mm mortar. Look below to see the placement for each variant.
Monitor (VUSBX13) Monitor (VUSBX13)
Happy Modelling!
Monitor (VUSBX13)
Posted on

US Monitor Boat (VUSBX13) Spotlight


Monitor (VUSBX13) Includes one Monitor boat with optional zippo turrets and command tent .

The Monitor was based on the ATC, but the boat’s ramp was replaced with a blunt-shaped bow and the forecastle extended. Known as the MRF’s “battleship”, it could carry a large number of weapons. A river division had up to three available for operations to provide serious firepower to patrols.

Check out the Monitor in the online store here…

Monitors were heavily armored, and normally mounted the largest guns of all riverine warships. The name originated from the US Navy’s USS Monitor, which made her first appearance in the American Civil War, and being distinguished by the use of revolving gun turrets.

The Monitor could call on some formidable weaponry, including a powerful turret-mounted 40mm gun, three 20mm cannon, and a multipurpose 81mm mortar. And that’s not even mentioning the Zippo variant, with two fearsome flame-throwers.

Designed by Evan Allen
Painted by Aaron Mathie

Monitor (VUSBX13)
The Monitor Monitor

Length:

61’ (18.5m)
Beam: 17’ 6” (5.3m)
Draft: 3’ 6” (1m)
Displacement: 169,000lb (76 tonnes)
Speed: 8.5 knots (16km/h)
Crew: 11
The Monitor in ‘Nam

Monitor (VUSBX13)
Monitor (VUSBX13) Monitor (VUSBX13)
Monitor (VUSBX13)
Monitor (VUSBX13) Monitor (VUSBX13)
Posted on

PBR (Patrol Boat, River x2) Assembly


Step 1. Begin assembly of the Patrol Boat by gluing the radar dome into the hole in front of the boat’s pilot house.
PBR (Patrol Boat, Riverine x2) (VUSBX12) PBR (Patrol Boat, Riverine x2) (VUSBX12)
Tip: We recommend that you use good quality Super Glue to assemble resin and metal vehicles.
Step 2. Add the Twin M2 .50cal gun to the front deck turret. The front deck turret goes in the hole shown below. Do not glue it into place, so it can rotate to face toward its target.
PBR (Patrol Boat, Riverine x2) (VUSBX12) PBR (Patrol Boat, Riverine x2) (VUSBX12) PBR (Patrol Boat, Riverine x2) (VUSBX12)
Step 3. Next, add the upright armored shields in the slots located in the back of the boat. Make sure the rounded corners face upwards.
PBR (Patrol Boat, Riverine x2) (VUSBX12) PBR (Patrol Boat, Riverine x2) (VUSBX12)
Step 4. Begin assembly of the rear deck turret by adding the M2 .50cal to the gunner. Make sure the pin that holds the gun into place on the boat faces downwards.
PBR (Patrol Boat, Riverine x2) (VUSBX12) PBR (Patrol Boat, Riverine x2) (VUSBX12)
Step 5. Once the bond has cured, place the gunner into the notch that holds the gun as shown below.
PBR (Patrol Boat, Riverine x2) (VUSBX12) PBR (Patrol Boat, Riverine x2) (VUSBX12)

The fully assembled PBR

PBR (Patrol Boat, Riverine x2) (VUSBX12)
I hope you found this article helpful while assembling your PBR. Happy modelling!

~ George.