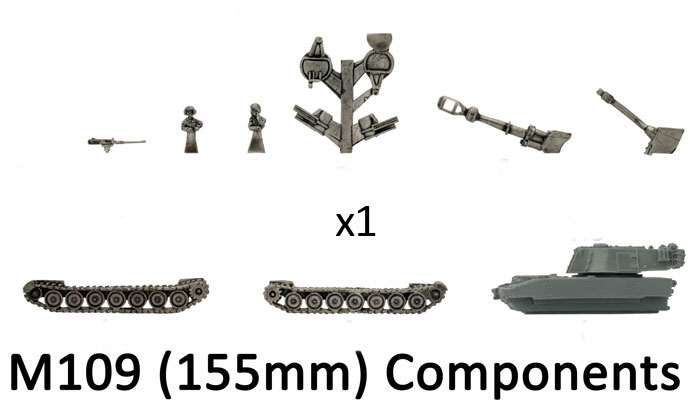
| Step 1. Begin assembly of the M109 (155mm) by attaching the tracks. | ||
| Tip: Ensure that the drive sprocket is towards the rear of the vehicle. | Below: The left-hand side track attached to the hull. | Below: The right-hand side track attached to the hull. |
 (VUSBX08)") |
 (VUSBX08)") |
 (VUSBX08)") |
| Tip: When referring to left or right-hand side in regards to a Flames Of War miniature, the orientation is determined as if looking at the vehicle from the rear. | ||
| Step 2. Next, attach the recoil spades to the back of the resin hull of the M109 (155mm). | Below: The left-hand side recoil spade in place. | Below: Both recoil spades correctly attached to the rear of the M109. | |
 (VUSBX08)") |
 (VUSBX08)") |
 (VUSBX08)") |
 (VUSBX08)") |
| Below: Tim has created a magnet well in the turret and the guns to make for an easy barrel swap. | Below: The magnet wells in the back of the gun barrels. | |
 (VUSBX08)") |
 (VUSBX08)") |
 (VUSBX08)") |
| Below: The magnets attached to the gun barrels. | Below: The 155mm gun barrel attached to the turret. | Below: The 105mm gun barrel attached to the turret. |
 (VUSBX08)") |
 (VUSBX08)") |
 (VUSBX08)") |
| Below: An optional step is to drill out the muzzle brake of the 155mm gun. | Tip: A 2mm drill bit is perfect for drilling out the muzzle brake of the 155mm gun barrel. | Below: Carefully drill through the first baffle of the muzzle brake. |
 (VUSBX08)") |
 (VUSBX08)") |
 (VUSBX08)") |
| Below: Drill through the second baffle of the muzzle brake. | Below: The completed drilled out muzzle brake of the 155mm. | Step 3. Next, attach the commander’s hatch to the top of the turret. | |
 (VUSBX08)") |
 (VUSBX08)") |
 (VUSBX08)") |
 (VUSBX08)") |
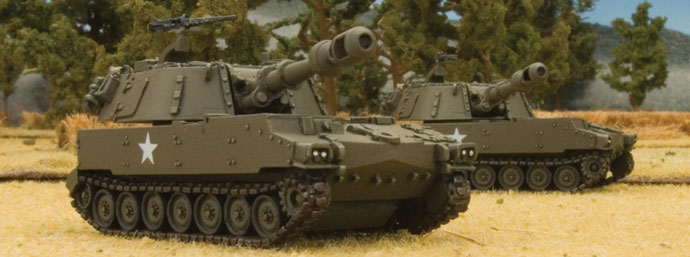
| Step 4. Attach the .50 cal AA MG to the mounting arm on the commander’s hatch. | Below: With the .50 cal AA MG in place, the M109 (155mm) is ready for painting. | |
 (VUSBX08)") |
 (VUSBX08)") |
 (VUSBX08)") |
| Adding A Tank Commander | ||||
| Step 1. Replace the close hatch with the open commander’s hatch. | Step 2. Attach a tank commander figure. | Step 3. Attach the .50 cal AA MG. | Below: The fully-assembled M109 (155mm) complete with tank commander. | |
 (VUSBX08)") |
 (VUSBX08)") |
 (VUSBX08)") |
 (VUSBX08)") |
 (VUSBX08)") |
")
")
")
")
")
")
")
")
")
")